Easily Integrate eSignature to Your Website with DocuSign
Grégoire Abachin17 min read

Have you ever wondered how to easily get documents electronically signed on one of your web applications?
DocuSign is the electronic signature solution we have chosen for one of our products to meet this need.
We have set up an application form on a business application in which users enter their information and then agree to respect conditions if their application is accepted.
To allow users to officially submit their requests and to legally commit them to the veracity of the information entered, our use case was to have them electronically sign a summary document generated by our application for each request.
Thanks to DocuSign, especially its ease of implementation and its ability to communicate via APIs, we can easily obtain proof of signature and choose how to authenticate our users when they sign.
Outline
Our goal is to create a signature flow from our backend to allow a user to sign their request.
We will detail this flow with the following steps:
- Configuration of the DocuSign environment
- Connection to DocuSign from our backend
- Creation of the signature flow
- Customization of the signature interface
- Monitoring the progress of the signature
- Go live process
Before we start — Implementation choice
The backend of our application runs on PHP and ready-made DocuSign libraries exist. However, we chose not to use them and develop our own API requests instead.
This choice allows us :
- to prevent us from being dependent on their libraries ;
- to be able to migrate to other electronic signature service providers easily (even if they do not provide libraries), by defining a common interface, specific to our business needs ;
Getting started with DocuSign
Creating a development account
The first mandatory step is to create an account on the DocuSign Developer environment. This account will be the one you use throughout your development process but will be different from the one used for the production environment (see the Going Live section for more details).
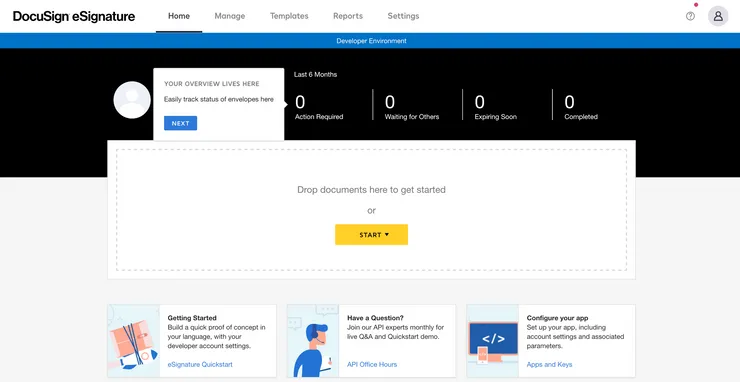
To create an account, simply go to DocuSign’s developer account application form and fill in the requested information. Then, once you have verified your account, you should be able to connect to the Developer Environment.
Registering an app
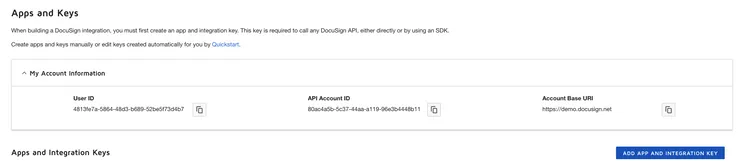
The next step is to register an app under the ‘Settings > Integrations > Apps and Keys’ menu.
Click on the “Add app and integration key” button :
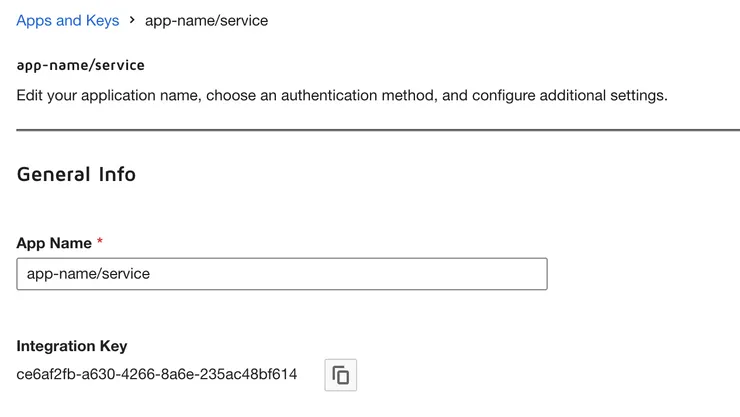
Choose a meaningful name for your app, app-name/service for instance, and click on “Create App”.
You should now see that an integration key has been created for your app :
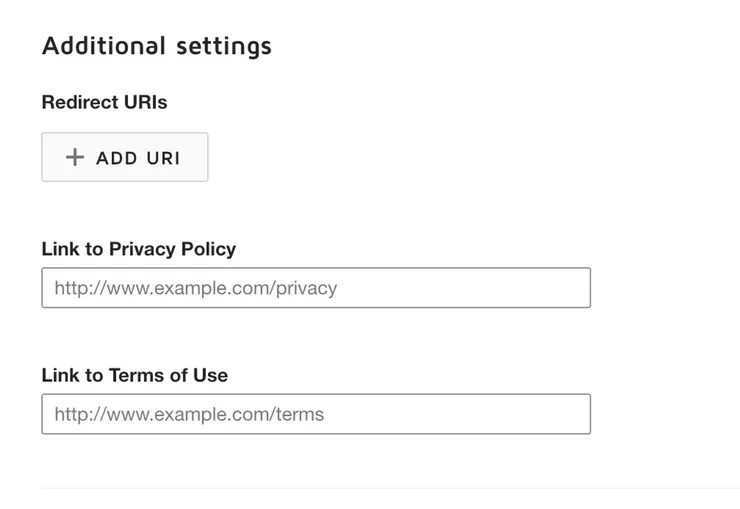
Under the Additional Settings section, add a redirect URI on which DocuSign will redirect users after login for your app.
You now have created an app, which you can use for your development.
Creating delegated access to your app
Now that you have an app, you should allow it to act on your behalf and interact with your DocuSign account.
That step is fairly easy, all you have to do is to open the following URL in your browser :
https://account-d.docusign.com/oauth/auth?response_type=code&scope=impersonation signature&client_id=<YOUR_INTEGRATION_KEY>&redirect_uri=<YOUR_REDIRECT_URI>
Of course, you should replace <YOUR_INTEGRATION_KEY> with the one displayed on DocuSign and <YOUR_REDIRECT_URI> with the one you previously added when configuring your application.
If everything is fine, you should see a page similar to the following :
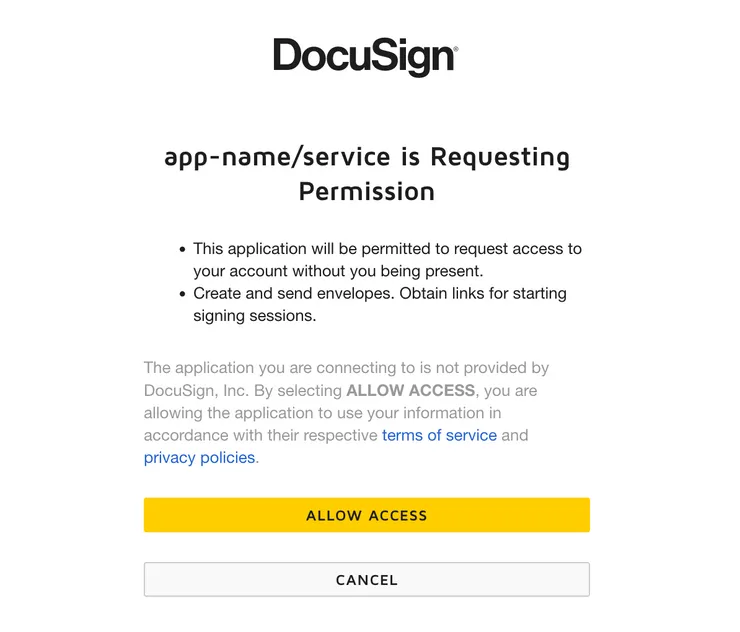
Once you “Allow access”, you will be able to generate envelopes and interact with your DocuSign account using the APIs.
Authenticating using JWT
To authenticate your request using DocuSign APIs, you will need to generate a JWT containing your authentication data and use it to retrieve an access token.
For DocuSign, it has the following structure:
[
    'iat' => time(), // The current time
    'exp' => time() + $this->electronicSignatureJwtExpirationDuration,  //The expiration time of the JWT
    'iss' => $this->electronicSignatureIntegrationKey, // Your app's integration key
    'sub' => $this->electronicSignatureUserId, // Your user id
    'aud' => $this->electronicSignatureJwtAud, // account-d.docusign.com for the dev environment
    'scope' => 'signature impersonation', //Required scopes
];
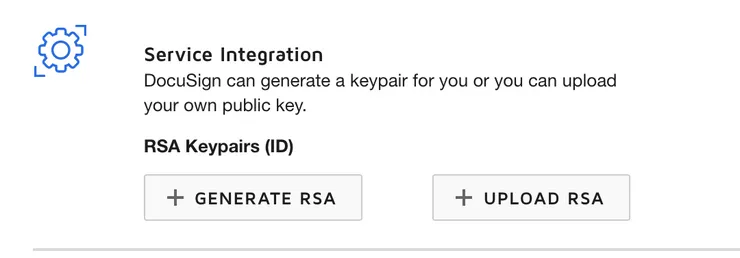
That JWT should be encoded using an RSA key-pair dedicated to your app, which you can generate or upload on the ‘Apps and keys’ page:
With PHP, you may use Firebase JWT Library to generate a JWT, and adapt the following code snippet to your needs:
public function generateJWT(): string
    {
		// In this example, the private key is encoded in base64
        // and passed as an environment variable.
        $key = base64_decode($this->electronicSignaturePrivateKey);
        $payload = [
            'iat' => time(),
            'exp' => time() + $this->electronicSignatureJwtExpirationDuration,
            'iss' => $this->electronicSignatureIntegrationKey,
            'sub' => $this->electronicSignatureUserId,
            'aud' => $this->electronicSignatureJwtAud,
            'scope' => 'signature impersonation',
        ];
        try {
            $jwt = JWT::encode($payload, $key, 'RS256');
        } catch (\Throwable $throwable) {
            $this->logger->error($throwable->getMessage());
            $this->logger->error($throwable->getCode());
            throw new \JWTGenerationException();
        }

        return $jwt;
    }
Once you have a JWT, you can use it against DocuSign OAuth Endpoint to retrieve an access token and include it in your request headers:
private const GRANT_TYPE = 'urn:ietf:params:oauth:grant-type:jwt-bearer';

/**
 * @return mixed[]
 */
private function getHeaders(): array
{
    return [
        'Authorization' => 'Bearer '.$this->getAccessToken(),
        'Content-Type' => 'application/json',
    ];
}

private function getAccessToken(): string
{
    $auth_endpoint = $this->authURI.'/oauth/token?assertion='.$this->jwtService->getJWT().'&grant_type='.self::GRANT_TYPE;
    $response = $this->client->request('POST', $auth_endpoint);
    $content = json_decode($response->getContent(), true);

    return $content['access_token'];
}
Creating an envelope
Now that these prerequisites are met, we can use the APIs to start a signing process on DocuSign.
On DocuSign, we talk about generating an envelope, which is made of:
- one or more documents
- one or more signers (having an account on Docusign or not)
- a signing order (who should sign and when ?)
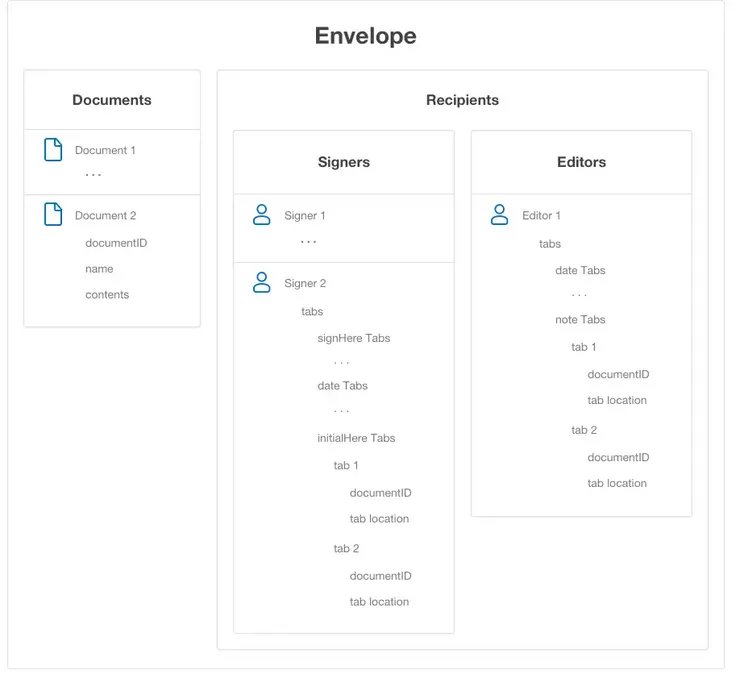 Envelope definition, taken from Docusign eSignature concepts
This action can be done fairly easily using a single endpoint:
<YOUR_BASE_URI>.'/restapi/v2.1/accounts/'.<YOUR_API_ACCOUNT_ID>.'/envelopes'
You have to provide two main elements :
-
The documents :
$documents = []; foreach ($documentsToSend as $document) { $documents[] = [ 'documentBase64' => $document->documentBase64, 'name' => $document->name, 'documentId' => $document->documentId, //An integer ]; } -
The recipients as
Signerentities :Signer.php
class Signer
{
    /**
     * The AnchoredTab class represents the fields from the 'Tabs' entities
     * @param AnchoredTab[] $anchoredSignHereTabs
     * @param AnchoredTab[] $anchoredDateSignedTabs
     * @param AnchoredTab[] $anchoredTextTabs
     * @param AnchoredTab[] $anchoredCheckboxTabs
     */
    public function __construct(
				public string $recipientId,
				public string $email,
				public string $name,
				public array  $anchoredSignHereTabs,
				public array  $anchoredDateSignedTabs,
				public array  $anchoredTextTabs,
				public array  $anchoredCheckboxTabs,
				public string $routingOrder
		){}
}
DocusignSignatureService.php
$signers = [];
foreach ($signersToAdd as $signer) {
    $docusignSigner = [
        'email' => $signer->email,
        'name' => $signer->name,
        'recipientId' => $signer->value,
        'routingOrder' => $signer->routingOrder,
				'tabs' => [
						'signHereTabs' => $signer->anchoredSignHereTabs,
						'textTabs' => $signer->anchoredTextTabs,
						'dateSignedTabs' => $signer->anchoredDateSignedTabs,
						'checkboxTabs' => $signer->anchoredCheckboxTabs,
    ];
    $signers[] = $docusignSigner;
}

$recipients = [
    'signers' => $signers,
];
In this example, there are several interesting pieces of information:
- the routing order: an integer that indicates in which relative order signers should sign. For instance with three signers, routing orders “
1→2→3” work, and “3→7→42” as well. - the recipient id: an integer that can then be used to refer to the signer entity and edit it later through specific endpoints.
- signHereTabs: an entity used to define one or multiple signature areas for a given signer
- textTabs: an entity used to define one or multiple text input fields for a given signer
- dateSignedTabs: an entity used to define one or multiple fields which will automatically be set to the date on which the user signs the document
- checkboxTabs: an entity used to define one or multiple checkboxes on the document.
Other tabs types and parameters exist, you can visit the Docusign Tabs full list to choose those that best meet your needs.
I strongly recommend using Anchored Tabs (tabs anchored using a text present in the document) to ensure your tabs still end up at the right place if you edit your documents.
Keep in mind that each time the text you chose appears in the document, a tab will be created. If you have no reliable text to use as an anchor, you may write some white text — if your background is white, of course — in your document to act as a placeholder for your tabs.
You can then build the body of your request with these elements, send it and retrieve an envelope id from DocuSign :
$body = json_encode([
    'emailSubject' => $emailSubject,
    'documents' => $documents,
    'recipients' => $recipients,
    'status' => 'sent',
    'brandId' => $brandId,
]);

$payload = ['body' => $body, 'headers' => $this->getHeaders()];

$response = $this->client->request('POST', $url, $payload);
$content = json_decode($response->getContent(), true);

$envelopeId = $content['envelopeId'];
Here is a sample envelope id:
45CDA3B7-41FD-400F-888F-8821953D05C0That envelope id will be required for any further action on the envelope, be sure to store it somewhere in your app.
- the routing order: an integer that indicates in which relative order signers should sign. For instance with three signers, routing orders “
Checking the status of an envelope
Now that you have created an envelope, you may want to check its status and rely on it to trigger specific actions in your app.
Using an endpoint
This could be done directly by sending GET requests to:
<YOUR_BASE_URI>.'/restapi/v2.1/accounts/'.<YOUR_API_ACCOUNT_ID>.'/envelopes/'.<ENVELOPE_ID>
This method can be useful if you want to check envelope details at a specific moment.
However, this implies that you have to ask DocuSign for the details each time you need them and you might end up violating DocuSign’s rate limits (not requesting the same data more than once a minute). If you want to detect updates this could also soon become a challenge if you manage thousands of envelopes and have to check all their statuses every 5 minutes for instance.
Hopefully, there exists a dedicated mechanism for that: webhooks.
Using webhooks
The goal of a webhook is to avoid having to constantly ping DocuSign servers to detect any update on your envelopes and having to do this for every envelope you generate. A webhook is a mechanism that allows you to register an open route on your web server that will be notified on each content update (depending on the events you choose to subscribe to).
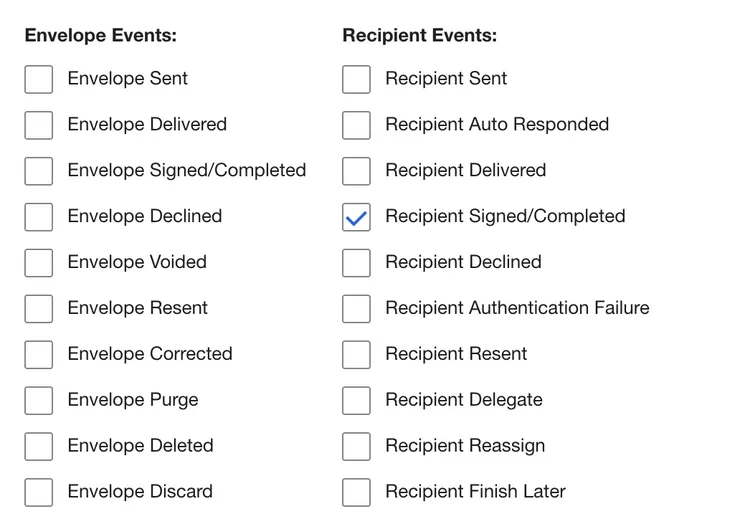
Using DocuSign, it is fairly easy to set up one. All you have to do is navigate to ‘Settings > Integrations > Connect’, register a new webhook by selecting all the event types you are interested in and provide the URL of the endpoint of your server dedicated to the handling of events.
Once on the ‘Connect’ page, all you have to do to register a webhook is to go under ‘Applications > Add configuration > Custom’, and choose a name for the connection and the destination URL (the one on your server listening for events).
You may select several events from the list :
The event sent would look like the following :
{
  "event": "recipient-completed",
  "uri": "/restapi/{apiVersion}/accounts/{accountId}/envelopes/{envelopeId}",
  "retryCount": "0",
  "configurationId": "xxxxxxx",
  "apiVersion": "v2.1",
  "generatedDateTime": "",
  "data": {
    "accountId": "xxxxxxxx-xxxx-xxxx-xxxx-xxxxxxxxxxxx",
    "recipientId": "1",
    "envelopeId": "xxxxxxxx-xxxx-xxxx-xxxx-xxxxxxxxxxxx",
    "envelopeSummary": {
      "status": "sent",
      "emailSubject": "API Demo subject",
      "emailBlurb": "Please sign this Demo Envelope",
      "signingLocation": "online",
      "enableWetSign": "true",
      "allowMarkup": "false",
      "allowReassign": "true",
      "createdDateTime": "2019-12-12T18:23:36.6800000Z",
      "lastModifiedDateTime": "2019-12-12T18:23:36.6970000Z",
      "statusChangedDateTime": "2019-12-12T18:23:36.6800000Z",
      "useDisclosure": "false",
      "sender": {
        "userName": "John Smith",
        "userId": "xxxxxxxx-xxxx-xxxx-xxxx-xxxxxxxxxxxx",
        "accountId": "xxxxxxxx-xxxx-xxxx-xxxx-xxxxxxxxxxxx",
        "email": "johnsmith@docusign.com",
      },
      "recipients": {...},
      "envelopeDocuments": [
        {
          "documentId": "1",
          "documentIdGuid": "xxxxxxxx-xxxx-xxxx-xxxx-xxxxxxxxxxxx",
          "name": "BlankDoc.txt",
          "type": "content",
          "order": "1",
          "display": "inline",
          "includeInDownload": "true",
          "signerMustAcknowledge": "no_interaction",
          "templateRequired": "false",
          "authoritative": "false:,
          "PDFBytes": "{base64FileContent}"
        }
      ]
    },
  }
}
To determine the event type when receiving one, you can use the value of the “event” field, recipient-completed for instance.
To help you identify which envelope triggered the event, DocuSign’s webhook messages always include the id of the envelope available under data → envelopeId.
The envelopeDocuments section allows you to retrieve the updated document content through the PDFBytes field. This can be used to store the document on your document storage tool.
To create a new route using PHP and Symfony, you can use the following code snippet:
/**
* @Route("/webhook/docusign", name="webhook_new_signature", methods={"POST"})
* @ParamConverter("docusignWebhookEventDTO ", converter="fos_rest.request_body")
*/
public function docusignWebhook(
  DocusignWebhookEventDTO $docusignWebhookEventDTO,
): JsonResponse {

	// Do something

  return new JsonResponse(['message' => 'Update complete.'], Response::HTTP_OK);
}
This is the URL you want to register when defining your webhook.
Customizing the emails sent to the signers
DocuSign comes with a branding mechanism that allows you to either customize the emails sent to the users or completely override the content sent.
Depending on your needs, you might want to use as well different brands (different logos and colors for instance) based on the context. This is also more reassuring for your users to see a familiar logo and set of colors on the emails they receive (even if those emails come from DocuSign).
Creating a brand
To start, navigate to ‘Settings > Account > Brands’ and click on ‘Add brand’. Once you’ve chosen a brand name, you’ll see a new page allowing you to customize your brand :
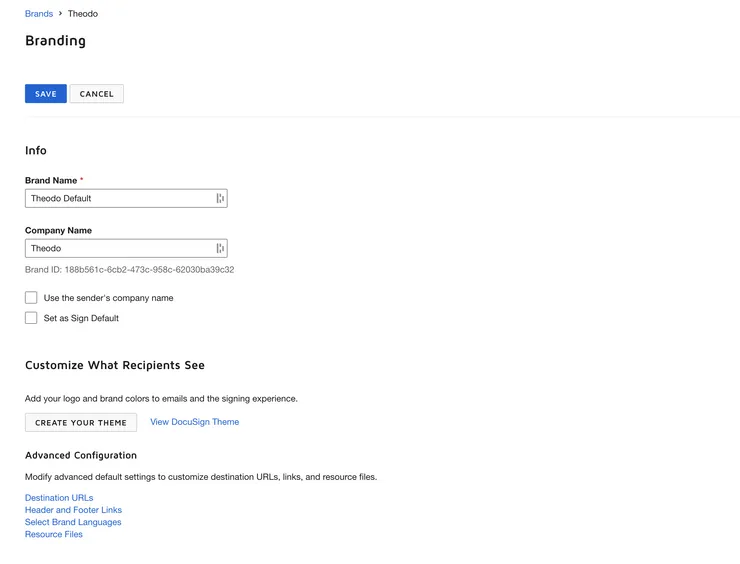
The Company Name will be displayed to your users while signing, whereas the Brand Name is only a name to help you differentiate between brands.
Simple brand customization
This option is available if you click on ‘Create your theme’. A popup will allow you to choose the logos and the colors to use :
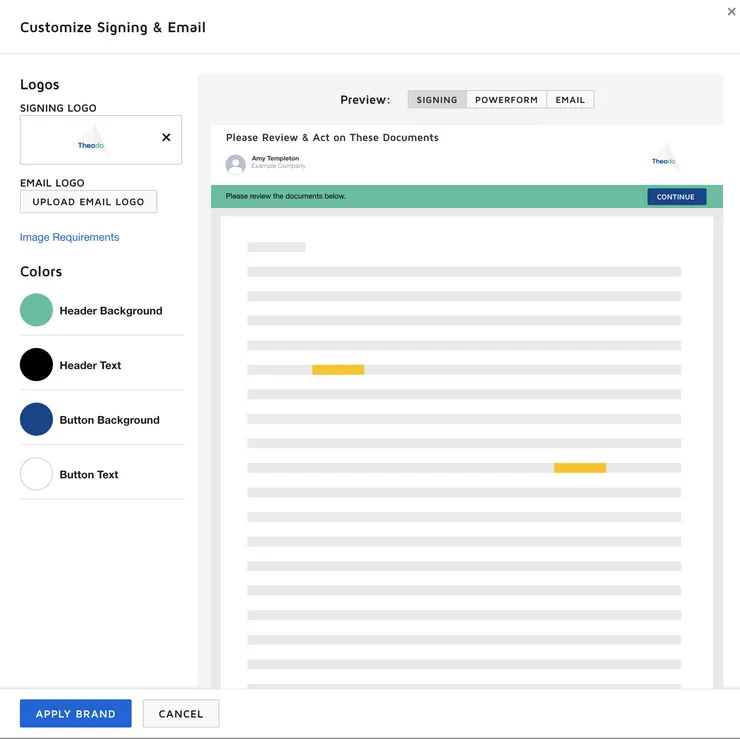
However, this option does not allow you to customize the text displayed on the screen or in the emails sent to your users. This is where the advanced configuration comes in.
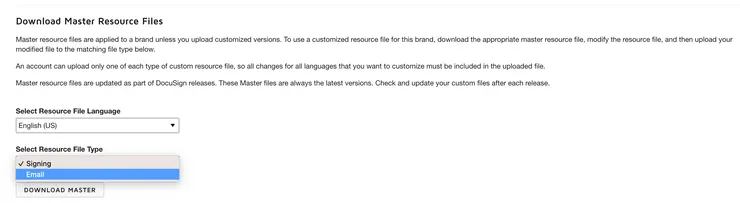
Advanced setup
In this section, you may set up additional links which will be displayed on the signature interface and/or redirection links.
Yet, the most interesting option, if you would like to have full control over the information displayed on screen or sent in emails, is to use the Resource files. The first step is to download the latest version of the master resource file corresponding to the language of your choice and the interface you want to customize: signing (online signing portal) or email (the content of the emails sent).
The content is the following for the email template called “EnvelopeActivation”:
<data name="EnvelopeActivation_PlainTextBody">
  Hello [[Data:RecipientName]], [[Data:SenderName]] has sent you a new DocuSign
  document to view and sign. Please click on the link below to begin signing.
  [[Data:EmailBlurb]] {..........}
  [[Conditional:IsEnvelopeContainingMultipleDocuments]]REVIEW DOCUMENTS
  [[Conditional:IsEnvelopeContainingSingleDocument]]REVIEW DOCUMENT
  [[Data:QuickURL]] If clicking the link does not work, you can highlight and
  copy the entire line above and paste it into your browser to get started. This
  message was sent to you by [[Data:SenderName]] who is using the DocuSign
  Electronic Signature Service. If you would rather not receive email from this
  sender you may contact the sender with your request. Do Not Share This Email
  This email contains a secure link to DocuSign. Please do not share this email,
  link, or access code with others. [[Conditional:ExpirationUrl]]Click here to
  expire the above link to the document Questions about the Document? If you
  need to modify the document or have questions about the details in the
  document, please reach out to the sender by emailing them directly.
  {..........}
</data>
<data name="EnvelopeActivation_Subject">
  [[Conditional:IsExpirationMail]]Expiration Pending:
  [[Conditional:IsReminderMail]]Reminder: [[Data:SubjectInput]]
</data>
It contains all the email text content. You can edit it to change the text sent to the user. Square brackets indicate dynamic fields, either related to the envelope ([[Data:XXXXXXX]]) or conditional ([[Conditional:XXXXXXXXXX]]). You will notice that you can customize both content and email subject, depending on your use case.
Once you are done with your text edits, all you have to do is upload the modified Resource file to DocuSign.
You may find more details on their Email Resource File Guide.
Using a brand for an envelope
To use a brand on an envelope, you can either set the brand as the default brand for your company or provide the brand id (188b561c-6cb2-473c-958c-62030ba39c32 for instance) as an additional parameter when creating your envelope with the APIs :
$body = json_encode([
  'emailSubject' => $emailSubject,
  'documents' => $documents,
  'recipients' => $recipients,
  'status' => 'sent',
  'brandId' => $brandId,
]);
You can provide the brand id as an argument to change the brand depending on the context.
Going live
Why a go-live process?
Once the setup of your branding is complete, you are ready to send your documents and start collecting signatures. Ensure that the setup of your webhooks is correct and that the URL used to send the webhooks is reachable from the internet. You can also check that the proper branding is set for your envelopes when using the DocuSign API.
The previous steps will be enough for testing/user acceptance environments but in a production environment, you do not want to display those terrible red watermarks at the top of all signed documents :

The diagram below, provided by DocuSign, summarizes the differences between the two environments :
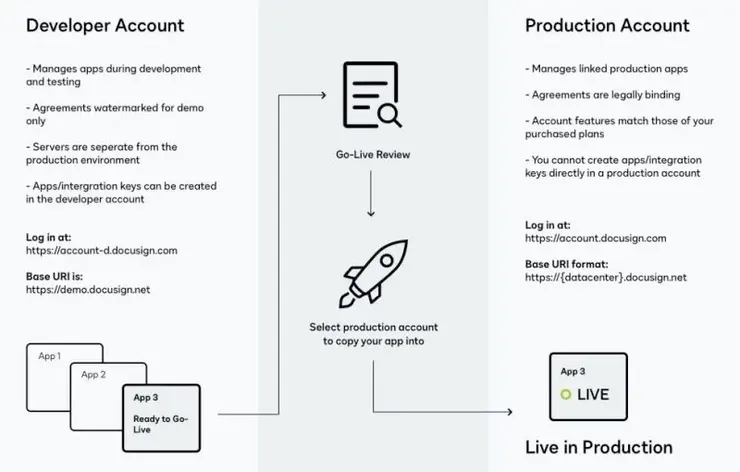 Differences between the environments, taken from Docusign Go Live process description
What to do?
To proceed to the next steps, you need an account on DocuSign’s production environment. DocuSign requests that you have completed at least 20 successful consecutive API calls to their demo environment. This requirement ensures you correctly use the APIs in the demonstration environment before considering going live.
The status of the application is shown in the ‘Settings > Integrations > Apps and keys’ page and is related to an app. Your goal is to make 20 successful API calls, wait for DocuSign to acknowledge your API calls were successful, and then have the status become ‘Submit for review’.

You should then click on the ‘Actions > Start go-live review’ button :
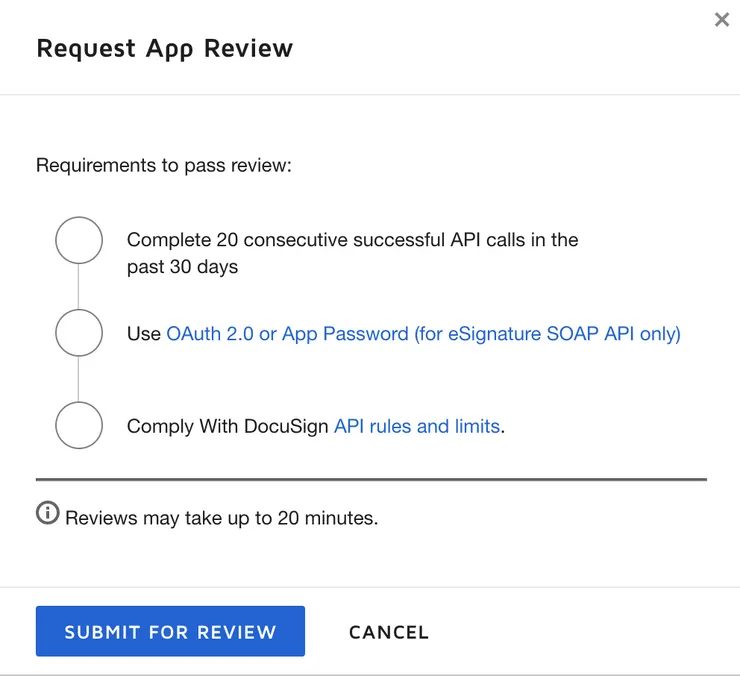
If you meet all requirements, you can submit for review, which consists of automated verification of the API calls made so far. If they are all compliant, the app status will change, meaning you can go live with the API.
The last step is to log in with an account on the production environment of DocuSign and accept to add the app as one of yours.
Going further
To improve the integration of DocuSign in your app, you may want to embed the signature window directly in your front end.
You will have to define a clientUserId when creating a recipient, and then use the createRecipientView endpoint to retrieve a signing URL (more details on the createRecipientView API reference )
For more details on how this works, you can have a look at the following article on embedded electronic signature with DocuSign :
Spice up Your Website with a DocuSign Electronic Signature Embedded Tool