Three Hacks to Level Up Your Maestro Testing
Claire Squires13 min read

Introduction
Our team at Theodo UK recently had the delightful challenge of building a universal app - an app that runs on multiple operating systems from a single codebase. This project presented many interesting technical problems, including the task of automating end-to-end testing for the mobile aspect of the app so we could validate user flows and flag any unexpected regressions.
We chose the UI testing framework Maestro, as well as a tool called Flashlight to automate our tests and measure performance. As is often the case with newer technologies, there seemed to be very little out there on how people used either Maestro or Flashlight. So when we encountered buggy tests, we found ourselves relying on good old-fashioned trial and error.
I hope that this article will save you some time if you run into any of the same problems we did, and perhaps start a conversation about the cool things people are doing with these tools.
Our Use Case
We had created a news app - a place where you can get articles, videos and live streams full of your local, newsworthy content, all of which is pulled from a CMS. It also has several other interesting features, each varying in complexity. We’d built it using React Native because it had to be available on both iOS and Android. If you’re curious about how universal apps work and their benefits, check out this article by James Haworth Wheatman.
It had come time to start writing end-to-end (E2E) tests for our user flows - this responsibility was handed over to those of us working over the Christmas break, aptly named the “Christmas Elves”. As we started writing tests for each flow, we found ourselves having to dig deep into the depths of the internet as well as reach out to our network to solve the problems we faced - the latter made all the more challenging since most other people were out of office, presumably wrestling wrapping paper and perfecting eggnog recipes.
Why Maestro and Flashlight?
We chose Maestro because it’s simple to set up, and the test files themselves are easy to write and consume. Testing a flow only requires a single YAML file that is easy to write because each step is just a simple, readable Maestro command. Compared to Detox for example, which requires tests to be written in jest, Maestro is a clear winner.
- tapOn: "First Name"
- inputText: "Khanya"
Since we wanted to automate running these tests, in our case every night, we needed them to be triggered by a GitHub workflow. Luckily, our colleague Alexandre Moureaux at BAM has created Flashlight, which allows you to run performance tests of your mobile apps by hitting an endpoint. You simply provide it with the path to your app build, usually an APK file (for android), as well as the user flow you’d like to measure. For an introduction to Flashlight, as well as steps on how to set this up on your own project, read Nightly End-to-End & Performance Tests with Flashlight by our Head of Mobile, Mo Khazali.
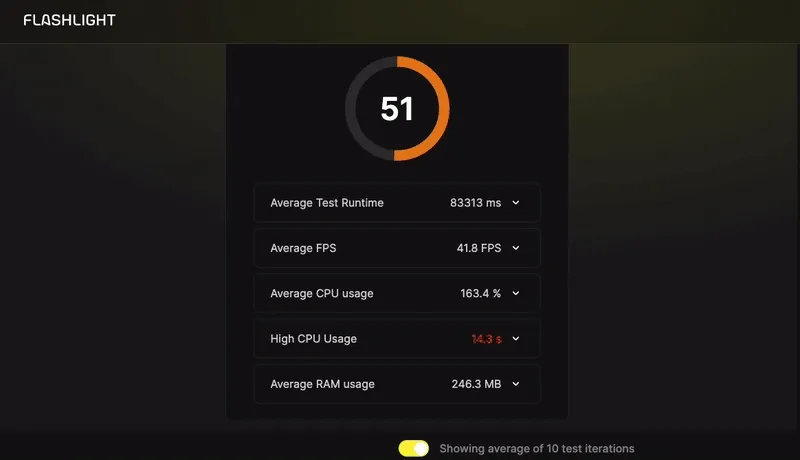
Using this combination of Maestro and Flashlight to run nightly tests meant that when we returned to our desks in the morning, all our tests had run and we could see detailed reports and videos of each flow step by step. Having these videos was often very helpful when debugging failing tests - it was easy to see why the step you expected to work didn’t. This was one of the most useful features of Flashlight.
General Test Setup
The content covered in the Maestro docs is done pretty well, and I found it easy to understand. Our setup for each test was relatively simple, and didn’t go much beyond what is described in the docs. The only extra thing we needed to add was a clearState. This is because all our features were only accessible if the user is signed in, and we were using async storage to keep the user persistent for better UX. We therefore wanted to ensure that we had cleared the previous user, and were signed in again. We also decided to create a fake testing account for all the tests to sign in with.
App Builds
Because we were using Expo and React Native, we were able to use EAS Build to create standalone builds of our app. Each build artefact was then stored on our Expo account, making them easy to download, or reference from Flashlight.
We had also decided early on that we wanted to be able to have a development and staging build on our mobile devices simultaneously. This required giving the development build a different name from the staging build. We did this by adding a ternary in our app.config.js to determine the name of the app, depending on which variant we desired. The benefit of having a development build is that you can immediately see changes in the app, without having to create a new build.
const IS_DEV = process.env.APP_VARIANT === "development";
export default {
  name: IS_DEV ? "Newsapp - DEV" : "Newsapp",
  ios: {
    bundleIdentifier: IS_DEV ? "com.newsapp.dev" : "com.newsapp",
  },
  android: {
    package: IS_DEV ? "com.newsapp.dev" : "com.newsapp",
  }
Occasionally when we wanted to check something in the test, or debug a failing step, we needed to change the UI by editing some code. Since these changes would immediately be reflected in the development build, we sometimes wanted to target the dev build to check something worked. With our project setup this was easy - we merely needed to add .dev to the end of the appId at the top of the Maestro YAML test file. This made it easy to run Maestro locally and quickly debug tests because we didn’t need to create a new staging build every time (which in our case could take up to 30 minutes). This ended up being a big time-saver.
The Hacks to Solve Our Problems
Hack 1: Using testID to Handle Variable Layouts
An example of one of the user flows we wanted to test was whether a user could navigate to a news video page, and watch the video. The easiest way to do this would have been to specify the position of the video card (e.g. - tapOn: point: 50%,50%). And since flashlight always runs tests on Samsung A10s (read here to learn why), we can be confident this will work since the screen size is constant, so the content in position 50%, 50% will always be the same.
However because our app was almost entirely customisable from the CMS, we couldn’t guarantee any kind of layout. For example, we couldn’t know that the first card on the screen was going to be a video, it could just as well have been a card containing an article or live stream depending on what had been configured in the CMS. This was the first hurdle we had to overcome - and in theory it should have been quite simple.
The documentation shows you can target a specific component with an id.
- tapOn:
    id: "continue"
This only requires you to add the attribute testID to your component.
<VideoCard
	data=videoData
	testID="videoCard"
	onPress={handleVideoCardPress}
/>
Feeling rather pleased I had found such a simple solution, I added commands to scroll down the page until it reached this id. I ran the test, and it failed. It had just kept scrolling right past my card.
I first suspected that I hadn’t set the testID properly. But unlike on web where you can inspect every element with the chrome inspector, this is slightly more difficult on mobile. Eventually, I discovered that the testID wasn’t actually on the element I was expecting it to be on, and that’s why the test was failing. I got multiple people to sense-check me, to ensure I was putting the correct testID on the correct element. But we didn’t find any mistakes there, so I was thoroughly confused. I was beginning to think maybe the testID just didn’t work.
Only when we zoomed out and asked someone outside the team to help, did we see the problem. We were referencing the staging build in our test, but hadn’t created a new build of the app with the testID added. Since we wanted to check our tests passed on an environment as close to the final one as possible, we realised we would have to create a new staging build to see this change in our app build. We never made this mistake again.
In retrospect, it’s almost unbelievable how much time we spent trying to understand why this wasn’t working. So my biggest piece of advice - make sure you’re targeting the correct build, and it’s recent enough to reflect your desired changes.
It’s worth mentioning there are alternative, and perhaps more comprehensive ways to E2E test an app where the layout is changeable from a CMS that we unfortunately didn’t have time to explore on this project. One of these is setting up a testing profile that includes a separate CMS (and any other BE content) specifically for E2E testing. This means you can create content that will suitably test your features. You can then create a separate build for E2E testing, just by changing the env vars in your eas.json to point to your E2E content.
You could also go one step further, and create a script to generate seed test data. This includes user accounts, CMS content, or anything else your specific user flow might need.
Hack 2: Use Regex When String Matching
Another problem we ran into, which kept recurring, was that sometimes steps in the flow that required string matching unexpectedly failed. It was crucial for us to reliably achieve a positive match for a string for two of our most common steps: one, ensuring the expected screen content was present and two, determining when to stop scrolling, enabling us to click through to a feature using scrollUntilVisible.

Initially, we thought perhaps there were spaces at the ends of the string, and since we were asking for a perfect match it failed. But after inspecting all these elements, that theory was disproved. This problem was made all the more puzzling since the vast majority of our strings matched as expected, with only a few being undetectable.
Again, after searching through the Maestro docs for anything that might help us, we found out that the selectors can be any kind of regex. So we appended .* to the beginning and end of the string we wanted to match, and miraculously our tests passed.

We still aren’t sure why it doesn’t match the string exactly. Our best guess was that the styling library we were using, Tamagui, might be changing the string under the hood.
Hack 3: Seed Test Data Using evalScript
One of the more complex features we implemented was a chat room, where users could send messages to others in the community. This was an important feature to E2E test. Every time we run the test, we want to make sure that the message you write is actually sent and visible in the chat.
We quickly realised this would mean generating a random string to “send” in the chat and check against every time we ran the test, since we couldn’t keep testing for the same string, and had no way to clear a chat. Having looked at the Maestro documentation, this should have been easy using runScript. We could write a small script to generate a random string.
Unfortunately due to the setup of Flashlight, any test file is unable to reference other files. This left us needing to find a way to generate a random string in the YAML file to send in a message, and then reference this exact string again when we assertVisible. Flashlight are currently working on making YAML files able to reference other files.
Luckily, Maestro also has a method called evalScript where you can write an inline JavaScript function. My colleague Michael Kim, worked out a beautifully simple way to do just what we needed.
- evalScript: ${output.randomMessage = (Math.random() + 1).toString(36).substring(7)}
- inputText: ${output.randomMessage}
- tapOn: "send"
- assertVisible:
    text: ${output.randomMessage}
We also decided to dedicate one chatroom to E2E tests, so that we had a place our tests could send random nightly messages. Luckily, we had implemented a search for chatrooms, so were able to add steps to the test to search for the chatroom called “Maestro Tests”.
What Next?
While none of the workarounds we found were earth-shattering genius, they were each an interesting challenge to solve. Every morning we reviewed the Flashlight report to see one more test pass as a result of our problem-solving the previous day really did feel like Christmas morning. While we eventually got all our tests to pass, there are some questions we still don’t know the answers to. If anyone thinks they can shed some light on these, please reach out.
The biggest improvement I think we could make to our tests now, would be some refactoring. We have the same eight steps repeated at the beginning of each test to clear state, launch the app and then log in. Using Maestro’s runScript it would be easy enough to create a setup script that could be referenced in every other test. Since this would also make it possible to reference other scripts, perhaps ones that do more complex things than generate random strings, this seems like a feature worth adding to Flashlight in the future.
Acknowledgements
A huge thank you to Francisco Costa who was the tech lead on this project, and who helped us debug and trouble shoot no end. Thank you to Michael Kim, my fellow E2E elf, helping write tests for all our user flows. Finally, thank you to Alexandre Moureaux for creating Flashlight, without which this setup wouldn’t have been possible.
TLDR
Using Maestro and Flashlight, we set up end-to-end testing for the mobile implementation of an app. We encountered three interesting problems:
Hack 1: Use testID to identify elements
- Problem: Because all our content comes from a CMS, we had no guarantee of what the homepage layout would look like, making it difficult to test complete user flows for each feature
- Solution: using Maestro’s
testIDwe were able to label elements belonging to each feature, and therefore easily locate these elements in the test
Hack 2: Use regex with your string matching
- Problem: Occasionally, matching strings would unexpectedly fail. For example
assertVisiblewould fail, despite the word clearly being on the page. - Solution: Adding the regex pattern
.*to the beginning and end of the string we were expecting a match on fixed this problem. E.g.assertVisible: ".*Home.*"
Hack 3: Use evalScript to seed test data
- Problem: Due to the automation of our tests, we needed a way to create unique strings in a chatroom to send in a message, and then assert that the message was visible in the room
- Solution: Using
evalScriptwe were able to write a small JavaScript script to generate a random string