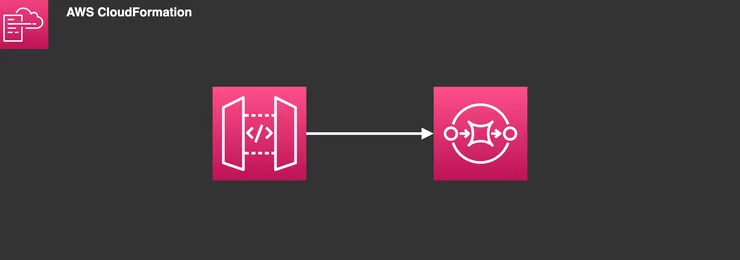
Creating an API Gateway to SQS direct connection using CloudFormation
Kelvin Xu6 min read

A common way of enqueuing messages to an AWS Simple Queue Service (SQS) is by sending a POST request to an endpoint hosted by an API Gateway. Using the AWS console, you can easily set up this connection between the API Gateway and SQS. However, we can also create this connection in CloudFormation and enjoy the benefits of Infrastructure-as-Code (IaC).
One of the main benefits of IaC here would be that you can automatically deploy changes and iterations of a stack utilizing these two services together. This would make it easier to avoid drift and human error in manual deployments.
In our example, we will be writing our CloudFormation configuration in JSON.
First, we create the API Gateway resource itself. We will be using a RestAPI here, which is specified under the Type field.
"APIGateway": {
    "Properties": {
        "Description": "API Endpoint to receive JSON payloads and queue in SQS",
        "Name": "CreativelyNamedAPIGateway"
    },
    "Type": "AWS::ApiGateway::RestApi"
},
Creating the queue is simple enough in CloudFormation. You will need to configure some of the parameters such as the maximum message size, message retention period, and the amount of time a call/action to recieve messages will wait for messages to arrive.
We also need to specify a policy for our queue. Here is a basic template of SQS and its policy that should fit most use cases, but feel free to customize it to your needs.
"DestinationQueue": {
    "Properties": {
        "DelaySeconds": 0,
        "MaximumMessageSize": 262144, // maximum size of message in bytes.
        "MessageRetentionPeriod": 1209600, // time SQS will retain a message.
        "QueueName": {
            "Ref": "queueName" // this queueName was defined under the Parameters section in our CF file. Feel free to change it.
        },
        "ReceiveMessageWaitTimeSeconds": 10, // time SQS will wait for message to arrive when RecieveMessage has been called.
        "VisibilityTimeout": 30 // period of time in seconds in which a received message is made unavailable to other consumers while it is being processed.
    },
    "Type": "AWS::SQS::Queue"
},

"PolicySQS": {
    "Properties": {
        "PolicyDocument": {
            "Statement": [
                {
                    "Action": "SQS:*",
                    "Effect": "Allow",
                    "Principal": {
                        "AWS": "111111111111" // your AWS account ID goes here
                    }
                    "Resource": {
                        "Fn::GetAtt": ["DestinationQueue", "Arn"]
                    },
                    "Sid": "Sid1517269801413"
                }
            ],
            "Version": "2012-10-17"
        },
        "Queues": [
            {
            "Ref": "DestinationQueue"
            }
        ]
    },
    "Type": "AWS::SQS::QueuePolicy"
},
After creating the queue, we need to create an IAM role to allow for the API Gateway to send messages to SQS. Since the API gateway is only concerned with sending messages to SQS, that’s the only permission we need to worry about.
"APIGatewayRole": {
    "Properties": {
        "AssumeRolePolicyDocument": {
            "Statement": [
                {
                    "Action": ["sts:AssumeRole"],
                    "Effect": "Allow",
                    "Principal": {
                        "Service": ["apigateway.amazonaws.com"]
                    }
                }
            ],
            "Version": "2012-10-17"
        },
        "Path": "/",
        "Policies": [
            {
                "PolicyDocument": {
                    "Statement": [
                        {
                            "Action": "sqs:SendMessage",
                            "Effect": "Allow",
                            "Resource": {
                                "Fn::GetAtt": ["DestinationQueue", "Arn"]
                            }
                        },
                        {
                            "Action": [
                            "logs:CreateLogGroup",
                            "logs:CreateLogStream",
                            "logs:PutLogEvents"
                            ],
                            "Effect": "Allow",
                            "Resource": "*"
                        }
                    ],
                    "Version": "2012-10-17"
                },
                "PolicyName": "api-gateway-sqs-send-msg-policy"
            }
        ],
        "RoleName": "api-gateway-sqs-send-msg-role"
    },
    "Type": "AWS::IAM::Role"
},
Next, we add our endpoints to the API Gateway. We will create an endpoint called ‘v1’, and then nest another endpoint under it called ‘enqueue’. These are endpoints that are specific to the queuing functionality of our API Gateway. When we call the API gateway, the URL we use would look something like this: https://<yourAPIurl>/v1/enqueue.
"v1Resource": {
    "Properties": {
        "ParentId": {
            "Fn::GetAtt": ["APIGateway", "RootResourceId"]
        },
        "PathPart": "v1",
        "RestApiId": {
            "Ref": "APIGateway"
        }
    },
    "Type": "AWS::ApiGateway::Resource"
},
"enqueueResource": {
    "Properties": {
        "ParentId": {
            "Ref": "v1Resource"
        },
        "PathPart": "enqueue",
        "RestApiId": {
            "Ref": "APIGateway"
        }
    },
    "Type": "AWS::ApiGateway::Resource"
},
Once that’s done, we need to configure POST and OPTIONS methods for the API Gateway to send messages through to the SQS. For the headers, you will need to specify the Content-Type to be application/x-www-form-urlencoded so that the message sent through the API is in a format that is accepted by SQS. The example below shows the specific parameters that were set for the POST method.
To resolve any potential CORS errors, we will need to include an OPTIONS method configuration under our gateway. These are the only essential methods for our configuration.
"OptionsMethod": {
    "Type": "AWS::ApiGateway::Method",
    "Properties": {
        "AuthorizationType": "NONE",
        "ResourceId": {
            "Ref": "enqueueResource"
        },
        "RestApiId": {
            "Ref": "APIGateway"
        },
        "HttpMethod": "OPTIONS",
        "Integration": {
            "IntegrationResponses": [
                {
                    "StatusCode": 200,
                    "ResponseParameters": {
                        "method.response.header.Access-Control-Allow-Headers": "'Content-Type,X-Amz-Date,Authorization,X-Api-Key,X-Amz-Security-Token'",
                        "method.response.header.Access-Control-Allow-Methods": "'POST,OPTIONS'",
                        "method.response.header.Access-Control-Allow-Origin": "'*'"
                    },
                    "ResponseTemplates": {
                        "application/json": ""
                    }
                }
            ],
            "PassthroughBehavior": "WHEN_NO_MATCH",
            "RequestTemplates": {
                "application/json": "{\"statusCode\": 200}"
            },
            "Type": "MOCK"
        },
        "MethodResponses": [
            {
                "StatusCode": 200,
                "ResponseModels": {
                    "application/json": "Empty"
                },
                "ResponseParameters": {
                    "method.response.header.Access-Control-Allow-Headers": false,
                    "method.response.header.Access-Control-Allow-Methods": false,
                    "method.response.header.Access-Control-Allow-Origin": false
                }
            }
        ]
    }
},
"PostMethod": {
    "Properties": {
        "AuthorizationType": "NONE",
        "HttpMethod": "POST",
        "Integration": {
            "Credentials": {
                "Fn::GetAtt": ["APIGatewayRole", "Arn"]
            },
            "IntegrationHttpMethod": "POST",
            "IntegrationResponses": [
                {
                    "StatusCode": "200",
                    "ResponseParameters": {
                        "method.response.header.Access-Control-Allow-Origin": "'*'"
                    }
                }
            ],
            "PassthroughBehavior": "NEVER",
            "RequestParameters": {
                "integration.request.header.Content-Type": "'application/x-www-form-urlencoded'"
            },
            "RequestTemplates": {
                "application/json": "Action=SendMessage&MessageBody=$input.body"
            },
            "Type": "AWS",
            "Uri": {
                "Fn::Join": [
                    "",
                    [
                        "arn:aws:apigateway:",
                        {
                            "Ref": "AWS::Region"
                        },
                        ":sqs:path/",
                        {
                            "Ref": "AWS::AccountId"
                        },
                        "/",
                        {
                            "Ref": "queueName"
                        }
                    ]
                ]
            }
        },
        "MethodResponses": [
            {
                "ResponseModels": {
                    "application/json": "Empty"
                },
                "StatusCode": "200",
                "ResponseParameters": {
                    "method.response.header.Access-Control-Allow-Origin": false
                }
            }
        ],
        "ResourceId": {
            "Ref": "enqueueResource"
        },
        "RestApiId": {
            "Ref": "APIGateway"
        }
    },
    "Type": "AWS::ApiGateway::Method"
},
Finally we create the deployment and stage resources so that we can deploy our API to a stage, making it ready for invocation.
"prodDeployment": {
    "DependsOn": "PostMethod",
    "Properties": {
        "RestApiId": {
            "Ref": "APIGateway"
        }
    },
    "Type": "AWS::ApiGateway::Deployment"
},
"prodStage": {
    "Properties": {
        "DeploymentId": {
            "Ref": "prodDeployment"
        },
        "RestApiId": {
            "Ref": "APIGateway"
        },
        "StageName": "Prod"
    },
    "Type": "AWS::ApiGateway::Stage"
},
If you wish to create a custom domain for your API Gateway, you will need to add some additional resources. You will need a total of 3 resources to set up the custom domain: the API Custom Domain resource, a route 53 resource, and an API mapping resource that maps your custom domain to the stage that your API gateway was deployed on.
"ApiGWCustomDomain": {
    "Type": "AWS::ApiGateway::DomainName",
    "Properties": {
        "DomainName": "custom-domain-name.com",
        "CertificateArn": { "Ref": "SSLCertificate" },
        "EndpointConfiguration": {
            "Types": ["EDGE"]
        },
        "SecurityPolicy": "TLS_1_2"
    }
},

"DNS": {
    "Type": "AWS::Route53::RecordSet",
    "Properties": {
        "HostedZoneName": "custom-domain-name.com.",
        "Name": "custom-domain-name.com.",
        "Type": "A",
        "AliasTarget": {
            "HostedZoneId": {
                "Fn::GetAtt": ["ApiGWCustomDomain", "DistributionHostedZoneId"]
            },
            "DNSName": {
                "Fn::GetAtt": ["ApiGWCustomDomain", "DistributionDomainName"]
            }
        }
    }
},

"APIMapping": {
    "Type": "AWS::ApiGateway::BasePathMapping",
    "DependsOn": ["ApiGWCustomDomain", "DNS"],
    "Properties": {
        "DomainName": "custom-domain-name.com",
        "RestApiId": {
            "Ref": "APIGateway"
        },
        "Stage": "Prod"
    }
},
Once this is all in place you can create your CloudFormation stack by copying and pasting this JSON template in the appropriate template field when you create a stack on the AWS console. Once your stack is deployed, you can use the API Gateway’s URL to start sending content to SQS via a post request. In our example, we used the Axios HTTP client to send our POST request.
axios.post(`https://custom-domain-name.com/v1/enqueue`, queueMessage, {
  headers,
});
Now you should have the tools you need to configure an API Gateway to SQS stack through CloudFormation. All the templates above are just starting points. Through CloudFormation, you can easily tweak the templates to meet your needs and redeploy the entire stack in each iteration of testing. Perhaps in the future you will consider using CloudFormation to configure more complex stacks in your apps and projects.

