Save Time Writing Jest Tests with jest-each (+ Examples)
Mike Riddelsdell6 min read
jest-each is a small library that lets you write jest test cases with just one line.
It was added to Jest in version 23.0.1 and makes editing, adding and reading tests much easier. This article will show you how a jest-each test is written with examples of where we use it on our projects.
A simple example jest test for a currencyFormatter function looks like this:
describe('currencyFormatter', () => {
  test('converts 1.59 to £1.59', () => {
    const input = 1.59;
    const expectedResult = "£1.59"
    expect(currencyFormatter(input)).toBe(expectedResult)
  })
  test('converts 1.599 to £1.60', () => {
    const input = 1.599;
    const expectedResult = "£1.60"
    expect(currencyFormatter(input)).toBe(expectedResult)
  })
})
The currencyFormatter function takes in one number argument, input, and returns a string of the number to 2 decimal places with a £ prefix. Simple.
But, what if you want to add more test cases? Maybe you want your currencyFormatter to comma separate thousands, or handle non-number inputs in a certain way. With the standard jest tests above, you’d have to add five more lines per test case.
With jest-each you can add new test cases with just one line:
describe('currencyFormatter', () => {
  test.each`
    input     | expectedResult
    ${'abc'}  | ${undefined}
    ${1.59}   | ${'£1.59'}
    ${1.599}  | ${'£1.60'}
    ${1599}   | ${'£1,599.00'}
    // add new test cases here
  `('converts $input to $expectedResult', ({ input, expectedResult }) => {
    expect(currencyFormatter(input)).toBe(expectedResult)
  })
})
There are 4 parts to writing a jest-each test:
- The first line in the template string:
test.each`
  input | expectedResult
...
`
This defines the variable names for your test, in this case input and expectedResult. Each variable must be seperated by a pipe | character, and you can have as many as you want.
- The test cases:
`...
  ${'abc'}  | ${undefined}
  ${1.59}   | ${'£1.59'}
  ${1.599}  | ${'£1.60'}
  ${1599}   | ${'£1,599.00'}
  // add new test cases here
`
...
Each line after the first represents a new test. The variable values are set to the relevant variable names in the first row and they are also seperated by a pipe | character.
- Print message string replacement:
('$input converts to $expectedResult', ...)
You can customise the print message to include variable values by prefixing your variable names with the dollar symbol $. This makes it really easy to identify which test case is failing when you run your tests. For example, the print messages for the example test above looks like this:
- Passing the variables into the test:
('$input converts to $expectedResult', ({ input, expectedResult }) => {
  expect(someFunction(input)).toBe(expectedResult)
})
An object of variables is passed to the test as the first argument of the anonymous function where you define your test assertions. I prefer to deconstruct the object in the argument.
jest-each with Older Versions of Jest
You can still use jest-each with older versions of Jest by installing it independently:
npm install jest-each
There are a just two things that you’ll need to do differently in your test files:
- Import
jest-eachat the top of your test file - Use
each``.testinstead oftest.each``
The currencyFormatter test above would look like this instead:
import each from 'jest-each'

 describe('currencyFormatter', () = {
   each`
     input     | expectedResult
     ${1.59}   | ${'£1.59'}
     ${1.599}  | ${'£1.60'}
     // add new test cases here
   `.test('converts $input to $expectedResult', ({ input, expectedResult }) => {
    expect(currencyFormatter(input)).toBe(expectedResult)
  })
})
And that’s all there is to it! Now you have enough to start writing tests with jest-each!
jest-each Tests
Service Test Example
jest-each makes testing services, like a currencyFormatter, very quick and easy. It’s also amazing for test driven development if that’s how you like to develop. We have found it has been really useful for documenting how a service is expected to work for new developers joining a project because of how easy the test cases are to read.
For example:
import currencyFormatter from 'utils/currencyFormatter'
describe('currencyFormatter', () => {
test.each`
input | configObject | expectedResult | configDescription
${'abc'} | ${undefined} | ${undefined} | ${'none'}
${5.1} | ${undefined} | ${'£5.10'} | ${'none'}
${5.189} | ${undefined} | ${'£5.19'} | ${'none'}
${5} | ${{dec: 0}} | ${'£5'} | ${'dec: 0'}
${5.01} | ${{dec: 0}} | ${'£5'} | ${'dec: 0'}
// add new test cases here
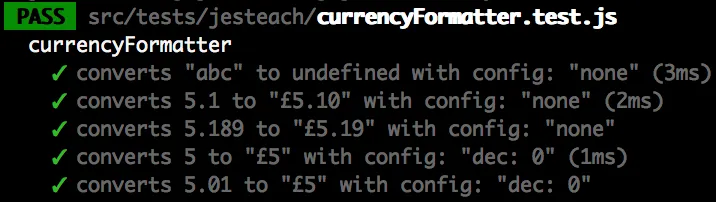
`('converts $input to $expectedResult with config: $configDescription',
({ input, configObject, expectedResult} ) => {
expect(currencyFormatter(input, configObject)).toBe(expectedResult)
}
)
})
Here we have a slightly more complicated currencyFormatter function that takes an extra configObject argument. We want to test that:
- it returns
undefinedwheninputis not a number - the default number of decimal places is 2
- that the
configObjectcan set the number of decimal places with thedeckey
We want to be able to identify the tests when they are running so we have also added a configDescription variable so we can add some text to the test’s print message.
Higher Order Component Test Example
We like to use jest-each to test and document the properties added to components by higher order components (HOCs). I’ve found this simple test particularly helpful when refactoring our large codebase of HOCs, where it has prevented bugs on multiple occasions. We have even added a project snippet so that setting up this test for new HOCs is even easier:
import { shallow } from 'enzyme'
import HomePage from '/pages'
import isLoading from '/hocs'

const TestComponent = isLoading(HomePage)

describe('wrapper', () => {
  const component = shallow(<TestComponent/>)
  test.each`
    propName
    ${'isLoading'}
    // add new test cases here
  `('wrapper adds $propName to the component', ({ propName }) => {
    expect(Object.keys(component.props()).toContainEqual(propName)
  })

  test.each`
    propName
    ${'notThisProp'}
    ${'orThisOne'}
    // add new test cases here
  `('wrapper does not add $propName to the component',
    ({ propName }) => {
      expect(Object.keys(component.props()).not.toContainEqual(propName)
    }
  )
})
Snapshot Branches Test Example
You can also test multiple snaphsot branches succintly by using jest-each:
import Button from '/components'

describe('Component', () => {
  const baseProps = {
    disabled: false,
    size: 'small',
  }
  test.each`
    changedProps        | testText
    ${{}}               | ${'base props'}
    ${{disabled: true}} | ${'disabled = true'}
    ${{size: 'large'}}  | ${'size = large'}
    // add new test cases here
  `('snapshot: $testText', ({ changedProps }) => {
    const component = shallow(<Button {...baseProps} {...changedProps} />)
    expect(component).toMatchSnaphot()
  })
})
You can learn more about snapshot tests here.
These three types of tests, plus some Cypress integration and end-to-end tests is enough for our current application… but that discussion is for another post.
Happy testing with jest-each!
