Build and access your first AR webapp in less than 10mn using ARjs
Bastien Teissier8 min read
In this tutorial, you will see how to use ARjs on simple examples in order to discover this technology. You don’t need any huge tech background in order to follow this tutorial.
1 - Your very first AR example
First we will start with a simple example that will help us understand all the elements we need to start an ARjs prototype.
Library import
As I wished to keep it as simple as possible we will only use html static files and javascript libraries. Two external librairies are enough to start with ARjs.
First we need A-Frame library, a web-framework for virtual reality. It is based on components that you can use as tag once defined.
You can import A-Frame library using the folowing line :
<script src="https://aframe.io/releases/0.6.1/aframe.min.js"></script>
Then we need to import ARjs, the web-framework for augmented reality we are going to use.
<script src="https://cdn.rawgit.com/jeromeetienne/AR.js/1.5.0/aframe/build/aframe-ar.js"></script>
Initialize the scene
A-Frame works using a scene that contains the elements the user wants to display. To create a new scene, we use the a-scene tag :
<a-scene stats embedded arjs='trackingMethod: best; debugUIEnabled: false'>
  <!-- All our components goes here -->
</a-scene>
Note the 2 elements we have in our a-scene tag :
- stats : it displays stats about your application performance. You are free to remove it, but to start it will give us some useful information.
- arjs : Here you can find some basic ARjs configuration. trackingMethod is the type of camera tracking you use, here we have choosen which is an auto configuration that will be great for our example. And debugUIEnabled is set at false in order to remove debugging tools from the camera view.
Shape
Then we will use our first a-frame component. A-frame is built around a generic component a-entity that you use and edit to have the behaviour you want.
In this demo, we want to display a cube. Thankfully a components exists in A-frame, already implemented, that can be used to do that :
<a-box position="0 0 0" rotation="0 0 0"></a-box>
a-box has a lot of attributes on which you can learn more in the official documentation, here we will focus on two attributes :
- position : the three coordinates that will be used to position our components
- rotation : that color of the shape
Marker
We are going to use a Hiro marker to start. It is a special kind of marker designed for augmented reality. We will dig deeper into other markers in one of the following part.

Deployment
As announced we want to make our application accessible from a mobile device, so we will need to deploy our web page and make it accessible from our smartphone.
http-server
There are a lot of node modules that you can use to start a development web server, I choose to use http-server which is very simple and can be used with a single command line.
First you need to install the module by running the following command
npm install -g http-server
Then to launch your server, you can do it with the command line :
http-server
You can use other tools, such as the python based SimpleHTTPServer which is natively available on macOS with the following command:
python -m SimpleHTTPServer 8000
ngrok
Now that your server is running, you need to make your webpage accessible for your mobile device. We are going to use ngrok. It is a very simple command line tool that you can download from here : https://ngrok.com/download.
Then you use ngrok with the following command :
ngrok http 8080
It will redirect all connections to the address : http://xxxxxx.ngrok.io, directly toward your server and your html page.
So with our index.html containing the following :
<!doctype HTML>
<html>
<script src="https://aframe.io/releases/0.6.1/aframe.min.js"></script>
<script src="https://rawgit.com/donmccurdy/aframe-extras/master/dist/aframe-extras.loaders.min.js"></script>
<script src="https://cdn.rawgit.com/jeromeetienne/AR.js/1.5.0/aframe/build/aframe-ar.js"> </script>
<body style='margin : 0px; overflow: hidden;'>
<a-scene stats embedded arjs='trackingMethod: best;'>
<a-marker preset="hiro">
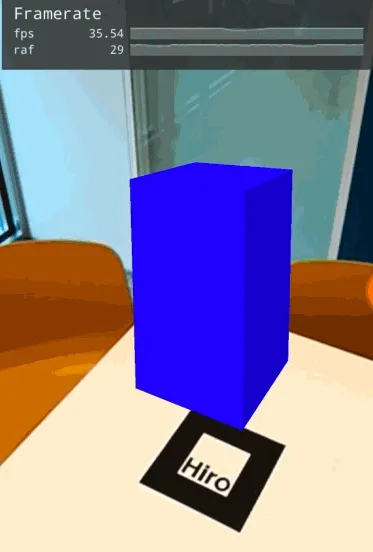
<a-box position='0 1 0' material='color: blue;'>
</a-box>
</a-marker>
<a-entity camera></a-entity>
</a-scene>
</body>
</html>
Or if you prefer on codepen.
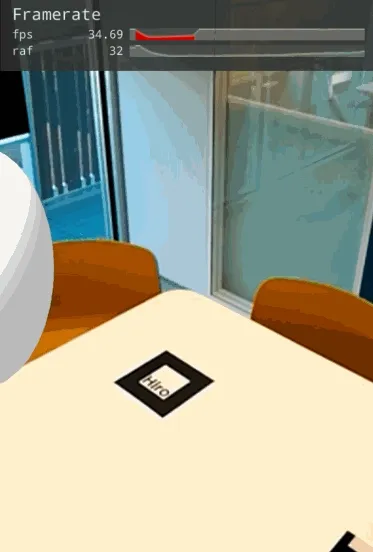
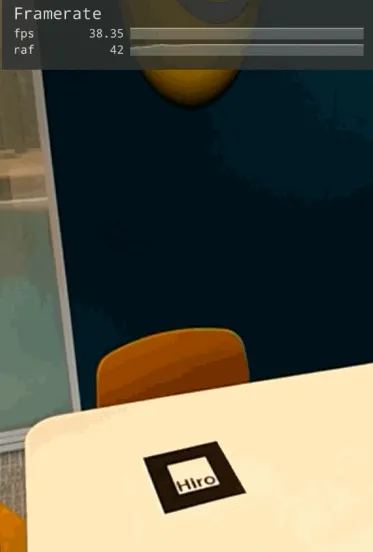
And the result should look like :
2 - Animation
Now that we were able to display our first A-frame component, we want to make it move.
A-frame contains a component a-animation that has been designed to animate an entity. As A-frame uses tag components, the a-animation has to be inside the entity tag that you want to animate :
  <a-entity>
    <a-animation></a-animation>
  </a-entity>
a-animation can be used on various attributes of our entity such as position, rotation, scale or even color.
We will see in the next part what can be done with these attributes.
Basics
First we will focus on some basic elements that we will need but you will see that it is enough to do a lot of things.
- dur : duration of the animation
- from : start position or state of the animation
- to : end position or state of the animation
- repeat : if and how the animation should be repeated
Position
We will begin with the position, we want our object to move from one position to another. To start with this animation, we only need a 3 dimension vector indicating the initial position and the final position of our object.
Our code should look like this :
<a-animation attribute="position"
    dur="1000"
    from="1 0 0"
    to="0 0 1">
</a-animation>
Rotation
Rotations work the same, except that instead of a vector you have to indicate three angles :
<a-animation attribute="rotation"
    dur="2000"
    from="0 0 0"
    to="360 0 0"
    repeat="indefinite">
</a-animation>
You can either make your entity rotate on itself:

You can access the full code here.
Or make it rotates around an object:
And the full code is here.
Others properties
This animation pattern works on a lot of others properties, for example :
- Scale :
<a-animation
    attribute="scale"
    to="2 2 3">
</a-animation>
- Color :
<a-animation
    attribute="color"
    to="red">
</a-animation>
Trigger
a-animation has a trigger : begin. That can either be used with a delay or an event. For example :
<a-animation
    begin="3000"
    attribute="color"
    to="red">
</a-animation>
This animation will start in 3000ms.
Otherwise with an event you can use :
<a-entity id="entity">
<a-animation
    begin="colorChange"
    attribute="color"
    to="red">
</a-animation>
With the event emission :
document.querySelector('#entity').emit('colorChange');
Combining
You can of course, use multiple animations either by having multiple entities with their own animations or by having imbricated entities that share animation.
First case is very simple you only have to add multiple entities with an animation for each.
Second one is more difficult because you must add an entity inside an entity, like in this example :
<a-entity>
    <a-animation attribute="rotation"
      dur="2000"
      easing="linear"
      from="0 0 0"
      to="0 360 0"
      repeat="indefinite"></a-animation>
          <a-entity rotation="0 0 25">
              <a-sphere position="2 0 2"></a-sphere>
          </a-entity>
</a-entity>
The first entity is used as the axis for our rotating animation.
3 - Model loading
Type of models
You can also load a 3D model inside ARjs and project it on a marker. A-frame works with various models type but glTF is privilegied so you should use it.
You can generate your model from software like Blender. I have not so much experience in this area, but if you are interested you should give a look at this list of tutorials: https://www.blender.org/support/tutorials/
You can also use an online library to download models, some of them even allow you to directly use their models.
Loading a model from the internet
During the building of this tutorial, I found KronosGroup github that allow me to made my very first examples with 3d model. You can find all their work here : https://github.com/KhronosGroup/glTF-Sample-Models
We will now discover a new component from A-frame : a-asset. It is used to load your assets inside A-frame, and as you can guess our 3d model is one of our asset.
To load your 3d model, we will use the following piece of code :
<a-assets>
      <a-asset-item id="smiley" src="https://cdn.rawgit.com/KhronosGroup/glTF-Sample-Models/9176d098/1.0/SmilingFace/glTF/SmilingFace.gltf"></a-asset-item>
</a-assets>
You can of course load your very own model the same way.
a-asset works as a container that will contain the a-asset-item you will need in your page. Those a-asset-item are used to load 3d model.
The full example look like this.
Display your model
Now that we have loaded our model, we can add it into our scene and start manipulating it. To do that we will need to declare an a-entity inside our a-scene that will be binded to the id of our a-asset-item. The code look like :
<a-entity gltf-model="#smiley" rotation= "180 0 0">
</a-entity>
Remember what we did in the previous part with animation. We are still working with a-entity so we can do the same here. The full code for our moving smiley is here.
And here is a demo :
4 - Markers
For now we only have used Hiro marker, now we will see how we can use other kind of marker.
Barcode
In ARjs barcode are also implemented in case you need to have a lot of different marker without waiting to create them from scratch. You first need to declare in the a-scene component what kind of marker you are looking for :
<a-scene arjs='detectionMode: mono_and_matrix; matrixCodeType: 5x5;'></a-scene>
As you can guess, our value will be found in a 5x5 matrix. And now the a-marker component will look like :
<a-marker type='barcode' value='5'></a-marker>
Custom marker
You can also use your very own custom marker. Select the image you want, and use this tool developed by ARjs developer.
You can then download the .patt file and you can use it in your application, like this:
<a-marker-camera type='pattern' url='path/to/pattern-marker.patt'></a-marker-camera>
Multiple markers
<script src="https://aframe.io/releases/0.6.0/aframe.min.js"></script>
<script src="https://jeromeetienne.github.io/AR.js/aframe/build/aframe-ar.js"></script>
<body style='margin : 0px; overflow: hidden;'>
  <a-scene embedded arjs='sourceType: webcam;'>

    <a-marker type='pattern' url='path/to/pattern-marker.patt'>
      <a-box position='0 0.5 0' material='color: red;'></a-box>
    </a-marker>


    <a-marker preset='hiro'>
      <a-box position='0 0.5 0' material='color: green;'></a-box>
    </a-marker>


    <a-marker type='barcode' value='5'>
      <a-box position='0 0.5 0' material='color: blue;'></a-box>
    </a-marker>


    <a-entity camera></a-entity>
  </a-scene>
</body>
What’s next
You now have everything you need to start and deploy a basic AR web application using ARjs.
If you are interested in web augmented or virtual reality you can give a deeper look at the A-Frame library so that you will see you can build more custom component or even component you can interact with.