Build a Real-time Notification System With GraphQL, React and Apollo
Loïc Carbonne8 min read
Real-time has opened new opportunities in web applications.
By allowing users to get access to data as soon as it’s available, it provides them a better experience.
Thanks to real-time, you can edit documents collaboratively, play online with your friends, know exactly when your pizza delivery man will arrive or when you will arrive at destination depending of the current traffic.
In the past, implementing real-time had a huge cost and was reserved for top companies like Google or Facebook, but nowadays, emergence of real-time technologies and libraries makes it accessible to anyone.
GraphQL has integrated real-time in its specification with Subscriptions. That means that you can use real-time inside the same api you use for the rest of your application, providing an unique source of communication and a better organization.
In this tutorial, you will see how to implement a real-time web application with few lines of codes, using GraphQL, Apollo and React.
In order to accomplish this goal, we will build a notification system from scratch in two parts, first we will implement a GraphQL NodeJS express server, then a web application with React.
The code referring to this article can be found on GitHub.
1. The server
1.1. Bootstrap the GraphQL server
Let’s start with the initiation of the server.
Create a new folder and write the following commands inside:
npm initoryarn initto generate the package.json filenpm install --save express body-parser apollo-server-express graphql-toolsoryarn add express body-parser apollo-server-express graphql-toolsto install required libraries.
Create a new file index.js:
const express = require('express');
const bodyParser = require('body-parser');
const { graphqlExpress, graphiqlExpress } = require('apollo-server-express');
const { makeExecutableSchema } = require('graphql-tools');

const notifications = [];
const typeDefs = `
  type Query { notifications: [Notification] }
  type Notification { label: String }
`;
const resolvers = {
  Query: { notifications: () => notifications },
};
const schema = makeExecutableSchema({ typeDefs, resolvers });

const app = express();
app.use('/graphql', bodyParser.json(), graphqlExpress({ schema }));
app.use('/graphiql', graphiqlExpress({ endpointURL: '/graphql' }));
app.listen(4000, () => {
  console.log('Go to http://localhost:4000/graphiql to run queries!');
});
Congratulations, you have just created a GraphQL server with Express and Apollo!
You can launch it with the command: node index.js.
In this server, we added a GraphQL query named notifications that allows us to get all notifications.
You can test it with GraphiQL, by going to the adress http://localhost:4000/graphiql and sending the following query (it should return an empty array because there is no notifications available yet):
query {
  notifications {
    label
  }
}
The corresponding commit is available here.
1.2. Add a mutation to the server
Next, let’s add a mutation that will allow you to push notifications.
Update type definitions and resolvers in index.js:
...
const typeDefs = `
  type Query { notifications: [Notification] }
  type Notification { label: String }
  type Mutation { pushNotification(label: String!): Notification }
`;
const resolvers = {
  Query: { notifications: () => notifications },
  Mutation: {
      pushNotification: (root, args) => {
        const newNotification = { label: args.label };
        notifications.push(newNotification);

        return newNotification;
      },
  },
};
...
The pushNotification mutation is ready. You can test it in GraphiQL, with:
mutation {
  pushNotification(label:"My first notification") {
    label
  }
}
Click here for the commit.
1.3. Add subscriptions
The last step in the building of the server is adding the subscription, to make our server going to real-time.
Add the required libraries to use subscriptions: npm install --save graphql-subscriptions http subscriptions-transport-ws cors or yarn add graphql-subscriptions http subscriptions-transport-ws cors
Then add the subscription newNotification in the GraphQL schema:
const { PubSub } = require('graphql-subscriptions');

const pubsub = new PubSub();
const NOTIFICATION_SUBSCRIPTION_TOPIC = 'newNotifications';
...
  type Mutation { pushNotification(label: String!): Notification }
  type Subscription { newNotification: Notification }
...
const resolvers = {
  Query: { notifications: () => notifications },
  Mutation: {
      pushNotification: (root, args) => {
        const newNotification = { label: args.label };
        notifications.push(newNotification);

        pubsub.publish(NOTIFICATION_SUBSCRIPTION_TOPIC, { newNotification });
        return newNotification;
      },
  },
  Subscription: {
    newNotification: {
      subscribe: () => pubsub.asyncIterator(NOTIFICATION_SUBSCRIPTION_TOPIC)
    }
  },
};
const schema = makeExecutableSchema({ typeDefs, resolvers });
- Declare a PubSub and a topic corresponding to the new Subscription
- Declare the type definition of the new Subscription called newNotification
- Every time a new notification is sent via the pushNotification mutation, publish to PubSub with the relevant topic
- Sync the new notification Subscription with all events from PubSub instance corresponding to relevant topic
Finally, update the server configuration to provide Subscriptions via WebSockets.
const cors = require('cors');
const { execute, subscribe } = require('graphql');
const { createServer } = require('http');
const { SubscriptionServer } = require('subscriptions-transport-ws');
...
const app = express();
app.use('*', cors({ origin: `http://localhost:3000` })); // allows request from webapp
app.use('/graphql', bodyParser.json(), graphqlExpress({ schema }));
app.use('/graphiql', graphiqlExpress({
  endpointURL: '/graphql',
  subscriptionsEndpoint: `ws://localhost:4000/subscriptions`
}));
const ws = createServer(app);
ws.listen(4000, () => {
  console.log('Go to http://localhost:4000/graphiql to run queries!');

  new SubscriptionServer({
    execute,
    subscribe,
    schema
  }, {
    server: ws,
    path: '/subscriptions',
  });
});
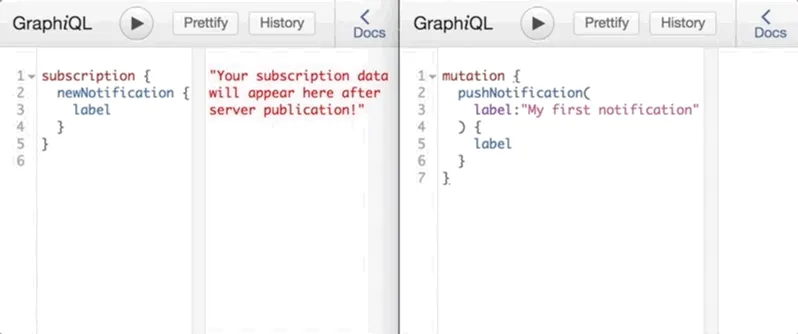
The server is ready, you can test the new Subscription with GraphiQL.
Use the following query to display new notifications on a windows.
subscription {
  newNotification {
    label
  }
}
And in another windows, if you push notifications via the mutation created before, you should see data from the subscription being updated.
You can find the relevant commit here
2. The React web application
2.1. Bootstrap the React app
Bootstrap the front-end application with Create React App:
npx create-react-app frontend
Corresponding commit here
2.2. Add mutation to push notifications
Next, we will set up Apollo Client to communicate with the GraphQL server.
Install the required libraries: npm install --save apollo-boost react-apollo graphql or yarn add apollo-boost react-apollo graphql
Update index.js
...
import { ApolloProvider } from 'react-apollo'
import { ApolloClient } from 'apollo-client'
import { HttpLink } from 'apollo-link-http'
import { InMemoryCache } from 'apollo-cache-inmemory'

const client = new ApolloClient({
  link: new HttpLink({ uri: 'http://localhost:4000/graphql' }),
  cache: new InMemoryCache()
})

ReactDOM.render(
  <ApolloProvider client={client}>
    <App />
  </ApolloProvider>,
  document.getElementById('root')
);
Then create a new component PushNotification that will be used to send pushNotification mutation.
PushNotification.js
import React, { Component } from 'react'
import { graphql } from 'react-apollo'
import gql from 'graphql-tag'

class PushNotification extends Component {
  state = { label: '' }

  render() {
    return (
      <div>
        <input
          value={this.state.label}
          onChange={e => this.setState({ label: e.target.value })}
          type="text"
          placeholder="A label"
        />
        <button onClick={() => this._pushNotification()}>Submit</button>
      </div>
    )
  }

  _pushNotification = async () => {
    const { label } = this.state
    await this.props.pushNotificationMutation({
      variables: {
        label
      }
    })
    this.setState({ label: '' });
  }
}

const POST_MUTATION = gql`
mutation PushNotificationMutation($label: String!){
  pushNotification(label: $label) {
    label
  }
}
`

export default graphql(POST_MUTATION, { name: 'pushNotificationMutation' })(PushNotification)
- As the component is wrapped by
graphql(POST_MUTATION, { name: 'pushNotificationMutation' })(PushNotification), this component has a prop pushNotification that can be used to call the mutation.
Then call PushNotification in AppComponent
import PushNotification from 'PushNotification'
...
  <div className="App-intro">
    <PushNotification/>
  </div>
...
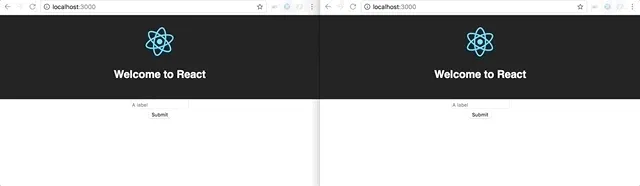
We can now push notifications from the React application! We can check that notifications are sent to the server with GraphiQL.
Corresponding commit is here
2.3. Add subscription to get real-time notifications
The last step is allowing subscriptions in the React application.
Install the required dependencies: npm install --save apollo-link-ws react-toastify or yarn add apollo-link-ws react-toastify.
- apollo-link-ws enables to send GraphQL operation over WebSockets.
- React Toastify will be used to push toasts when a notification is received
Then update Apollo Client configuration to use WebSockets
index.js
...
import { split } from 'apollo-link';
import { WebSocketLink } from 'apollo-link-ws';
import { getMainDefinition } from 'apollo-utilities';

const httpLink = new HttpLink({ uri: 'http://localhost:4000/graphql' });

const wsLink = new WebSocketLink({
  uri: `ws://localhost:4000/subscriptions`,
  options: {
    reconnect: true
  }
});

const link = split(
  ({ query }) => {
    const { kind, operation } = getMainDefinition(query);
    return kind === 'OperationDefinition' && operation === 'subscription';
  },
  wsLink,
  httpLink,
);

const client = new ApolloClient({
  link,
  cache: new InMemoryCache()
})
...
And wrap the main App component with the query corresponding to the subscription.
import { graphql } from 'react-apollo'
import gql from 'graphql-tag'
import { ToastContainer, toast } from 'react-toastify';

class App extends Component {
  componentWillReceiveProps({ data: { newNotification: { label } } }) {
    toast(label);
  }
  render() {
    return (
      <div className="App">
        ...
        <ToastContainer />
      </div>
    );
  }
}

const subNewNotification = gql`
  subscription {
    newNotification {
      label
    }
  }
`;

export default graphql(subNewNotification)(App);
- When a component is wrapped with a Subscription, it automatically receives data from the subscription in its props.
- Another method to receive data from Subscription is using subscribeToMore. This useful method merges the different received objects in your component state with other objects from classic GraphQL queries.
The notification system is now finished!
Final commit here
Conclusion
During this tutorial, we learnt how to build a real-time notification system from scratch with GraphQL, Apollo and express.
The current system is basic, next step could be adding authentification to push notification only to a specific user.
To go further, I highly recommend:
Don’t hesitate to give feedback, or share your experiences with real-time GraphQL in comments.