IOT Provisioning, As A Service: Resin.io
Ben Ellerby4 min read

An IOT Container Engine
When preparing a company-wide IOT(Internet of Things) hackathon I wanted to ensure all the Raspberry Pi devices we planned to use were ready for people to throw code at without needing monitors, keyboards, setting up ssh keys and getting frustrated by time wasted to getting to hello world.
I thought, we must have got further than this by now, with AWS I can spin up a complete load balanced server anywhere in the world in a matter of minutes…
And we have got further…
Resin.io brings simplicity to one of the most challenging and for me boring aspects of IOT; provision of devices. More than simplifying life for developers who want to build awesome products, it provides the tools to deal with real life IOT applications at scale. - For example fleet wide deployments ready at the click of a button.
So let’s get to Hello World.
Go to resin.io and sign up for free.
Create a new application, selecting the IOT device you want to use (note this does not seem to be editable later), in our case a Raspberry Pi 3.
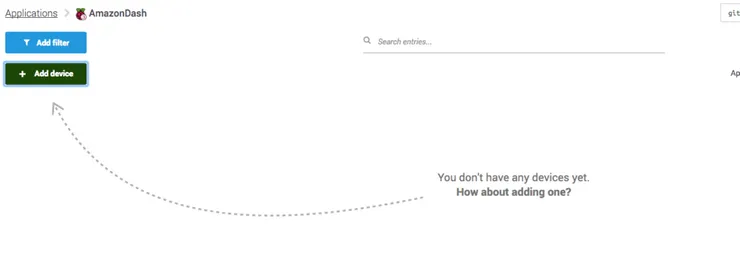
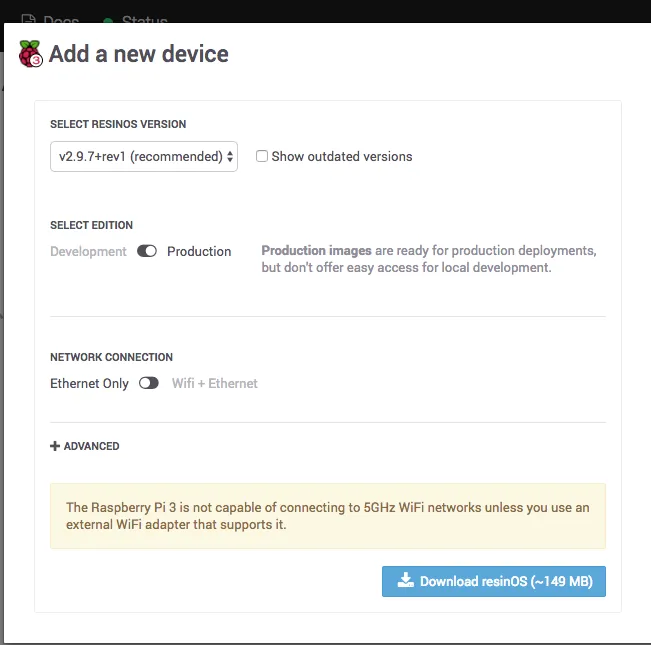
Now click, add a device, keep the defaults and click download the OS.
While that’s downloading, install etcher.io. Etcher. An open source tool from resin.io that allows you to easily burn images.
Now plug in your SD card, open Etcher and select the file you downloaded for the SD card you just plugged in and wait…
While your waiting let’s make an ssh key for our resin account:
ssh-keygen -t rsa -b 4096 -C “YOUR_EMAIL_ADDRESS”
Give a file name at the prompt.
Now copy the ssh public key: pbcopy < ~/.ssh/id_rsa_theodo_pi.pub
Go onto the dashboard and click add manual ssh key (or you could import keys from GitHub, but that feels weird to me!)
Now, back to the main event!
Go back to the resin.io dashboard and refresh.
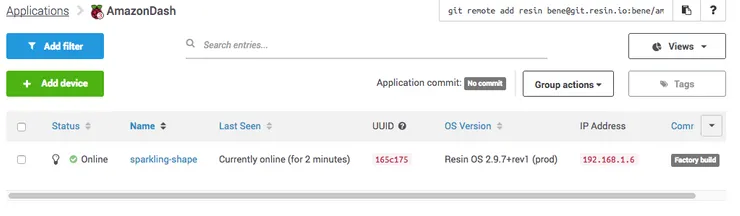
You should now see your device!
Click on the device and you can open the logs and console of the device or docker container inside.
Now let’s say hello
Resin provide a simple hello world boilerplate for the PI3 so lets clone:
git clone https://github.com/resin-io-projects/simple-server-node.git
We can now cd into this and add a remote directory as shown in the top right of the dashboard: git remote add resin USERNAME@git.resin.io:USERNAME/APPNAME.git
The first push will take some time (5 min), but docker container sharing will speed this up next time.
Also, the completion mascot is awesome!
Now, got to the IP address of your device in your browser and see the amazing words “Hello World!”.
Note: Depending on the config you used you could have set public HTTP forwarding for this device. This is a great feature but depending on your network could be a vulnerability to your home/office and I advise you close this unless you need it. You can turn this off in the actions section of the dashboard.
Let’s get personal
Hello world is great, but I prefer to be called by name. So time to push an update.
Edit the server.js file to say “Hello Ben” (or your name if you prefer).
Again, git push resin master and you’ll have your update in no time.
So this is way easier than it used to be, but if it’s still to slow a feedback loop for you how about hot reloading of your local code to one of your fleet devices?
Resin Sync to the rescue https://docs.resin.io/tools/cli/#sync-uuid-
In Conclusion:
Resin can takes the headache out of basic IOT provisioning.
At scale, it can allow a whole fleet of devices to be provisioned, updated, managed and debugged.
The use of docker allows a consistent build process across projects and fast deployments.