Bootstrap a Cross Platform App in 10 minutes with React Native
Grégoire Hamaide6 min read

Mobile Apps are a crucial part of our daily life.
Yet, building a native mobile app for everyone requires to have knowledge in at least two languages: Java for Android and Swift or Objective-C for iOS.
At least, that’s what I thought until I discovered React Native.
What is React Native?
React Native is a framework to build native apps using only Javascript.
For the Javascript fan I am, it’s a great opportunity.
React Native builds native apps, and not hybrid apps or «HTML5» apps.
This is possible because the Javascript written is transformed into native UI blocks for Android or iOS.
I suggest you check React Native’s official website for more information.
Let’s jump into building our first mobile app.
Installing React Native
The first step is installing React Native :)
I won’t pretend explaining this better than what has already been done in the last few months.
However, I have a few suggestions and links to share.
To install the CLI tools for React Native, you’ll need Node.js (Node.js 6 works fine, I haven’t tested other versions but React Native should work with Node.js 4 or newer).
Then you can just run npm install -g react-native-cli to install React Native.
iOS
In order to develop an iOS app, you’ll need a Mac with xCode (you can find it on the AppStore).
If you are using Linux, a great article has been published to help you develop iOS app on Linux.
XCode comes up with a simulator, which we will use for development.
Android
Testing you application on an Android device is a bit tougher.
The best practices are described on React Native’s website.
Here are the main points:
-
Install Android Studio
-
Set up paths
export ANDROID_HOME=~/Android/Sdk export PATH=${PATH}:${ANDROID_HOME}/tools -
Set up Android Virtual Device (if not set up by Android Studio)
android avd
Creating and running a React Native App
Everything in this article is summed up in this Github repository.
To create a React Native App run:
react-native init <YourAppNameHere>
Then launch it on the simulator you want with :
react-native run-ios
react-native run-android
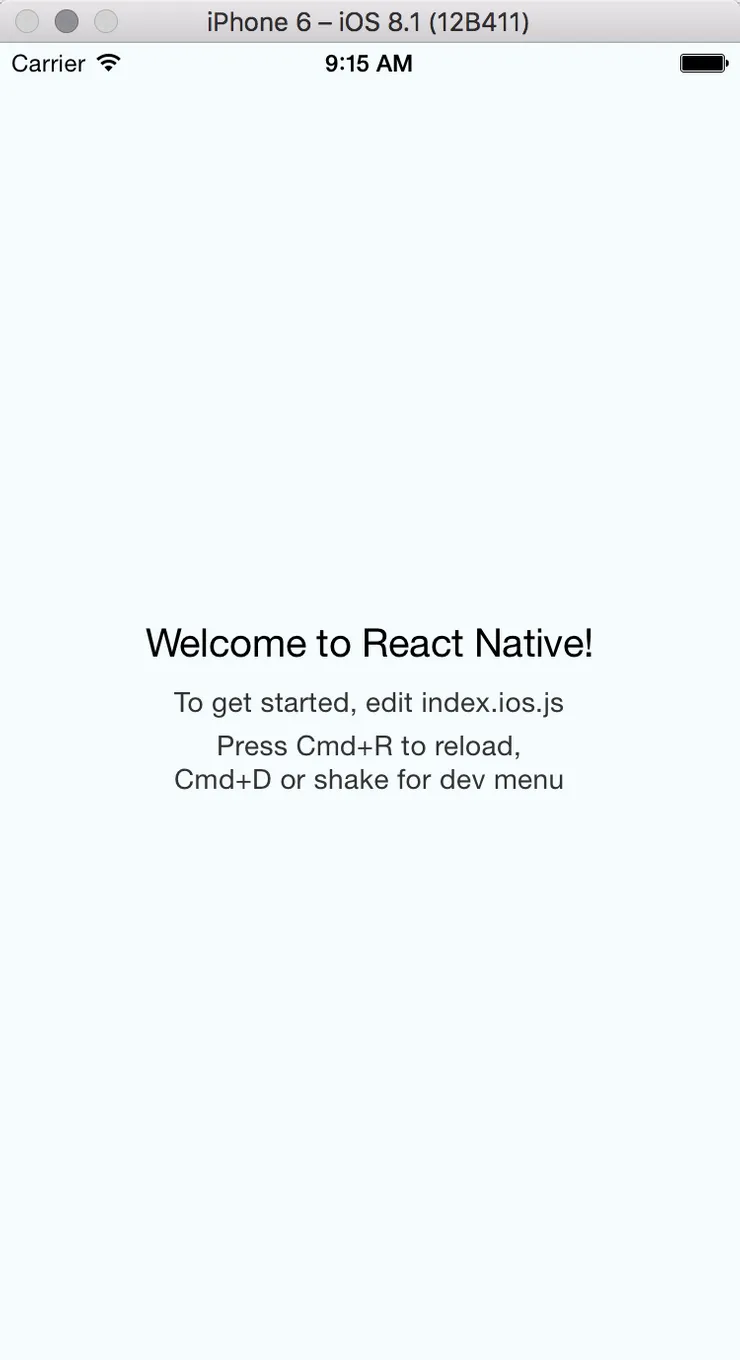
You should see the following screen on your emulator:
Modifying our app
Let’s enter the fun part!
Creating our first cross platform mobile app!
Open you favorite editor and let’s take a look at what React Native generated for us.
The whole code for this article is available here.
We have two files that represent our two entry points: one for iOS (index.ios.js) and one for Android (index.android.js).
Let’s play with the index.ios.js and change the text and style.
<Text style={styles.welcome}>
  Our first React Native App
</Text>
You can see the changes in your emulator by pressing Ctrl+R or Cmd+R thanks to some live reloading.
This makes React Native development so much easier.
How does the styling work in React Native?
The sample app gives us an example of how the styling works in React Native.
const styles = StyleSheet.create({
  container: {
    flex: 1,
    justifyContent: 'center',
    alignItems: 'center',
    backgroundColor: '#F5FCFF',
  },
});
There are two key points to have in mind when developing in React Native.
- React Native uses flexbox for the design.
If you’ve never used flexbox, here are two awesome links to master it in minutes :)
- React Native writes CSS styles in camel case.
background-color=>backgroundColorborder-width=>borderWidth
React Native Components
You can find a list of components to use in React Native on their official website.
For our demo app, we’ll use the navigation component given to us by RN : Navigator
Let’s create a src folder where the components inside will be used by both our Android and iOS app.
Inside our src folder, let’s create a components folder and inside it two JS files : firstPage.js and secondPage.js
firstPage.js
import React, {Component} from 'react';
import {
  StyleSheet,
  Text,
  TouchableHighlight,
  View
} from 'react-native';

import SecondPage from './secondPage';

class FirstPage extends Component {
  static route(props) {
    return {
      id: 'FirstPage',
      component: FirstPage
    };
  }

  render() {
    return (
      <View style={styles.container}>
        <Text>This is the first view</Text>
        <TouchableHighlight onPress={() => this.props.navigator.push(SecondPage.route())}</TouchableHighlight>
      </View>
    );
  }
}

const styles = StyleSheet.create({
  container: {
    flex: 1,
    justifyContent: 'center',
    alignItems: 'center',
    backgroundColor: '#FF00FF',
  },
});

export default FirstPage;
secondPage.js
import React, {Component} from 'react';
import {
  StyleSheet,
  Text,
  View
} from 'react-native';

class SecondPage extends Component {
  static route(props) {
    return {
      id: 'FirstPage',
      component: SecondPage
    };
  }

  render() {
    return (
      <View style={styles.container}>
        <Text>This is the second view</Text>
      </View>
    );
  }
}

const styles = StyleSheet.create({
  container: {
    flex: 1,
    justifyContent: 'center',
    alignItems: 'center',
    backgroundColor: '#FFFF00',
  },
});

export default SecondPage;
In the FirstPage component, our button is a TouchableHighlight and it has a onPress method that pushes the second view.
Our second page component just has a text.
We then need to set up our Navigator to go back and forth from one page to the other.
First, in our index.ios.js, let’s remove what’s in the container View and add a Navigator:
index.ios.js
render() {
  return (
    <View style={styles.container}>
      <Navigator
        initialRoute={FirstPage.route()}
        renderScene={this.renderScene}
        style={styles.navigator} />
    </View>
  );
}
Let’s analyze these lines.
- We’ve given our Navigator an initial route that will be displayed when loading our app.
- We’ve given a renderScene function that will render our different scenes.
We’ll take a look at this function in a moment. - We’ve given a style to our Navigator
What should our renderScene do?
Well, it should render our component.
Let’s see how to write this:
index.ios.js
renderScene = (route, navigator) => {
  return React.createElement(route.component, {navigator: navigator});
}
Our renderScene method takes two arguments.
The first one is the component we want to mount and the second one is the navigator itself.
We’ll need to pass the navigator to our components as a prop to be able to navigate back and forth.
FirstComponent
static route(props) {
  return {
    id: 'FirstPage',
    component: FirstPage
  };
}
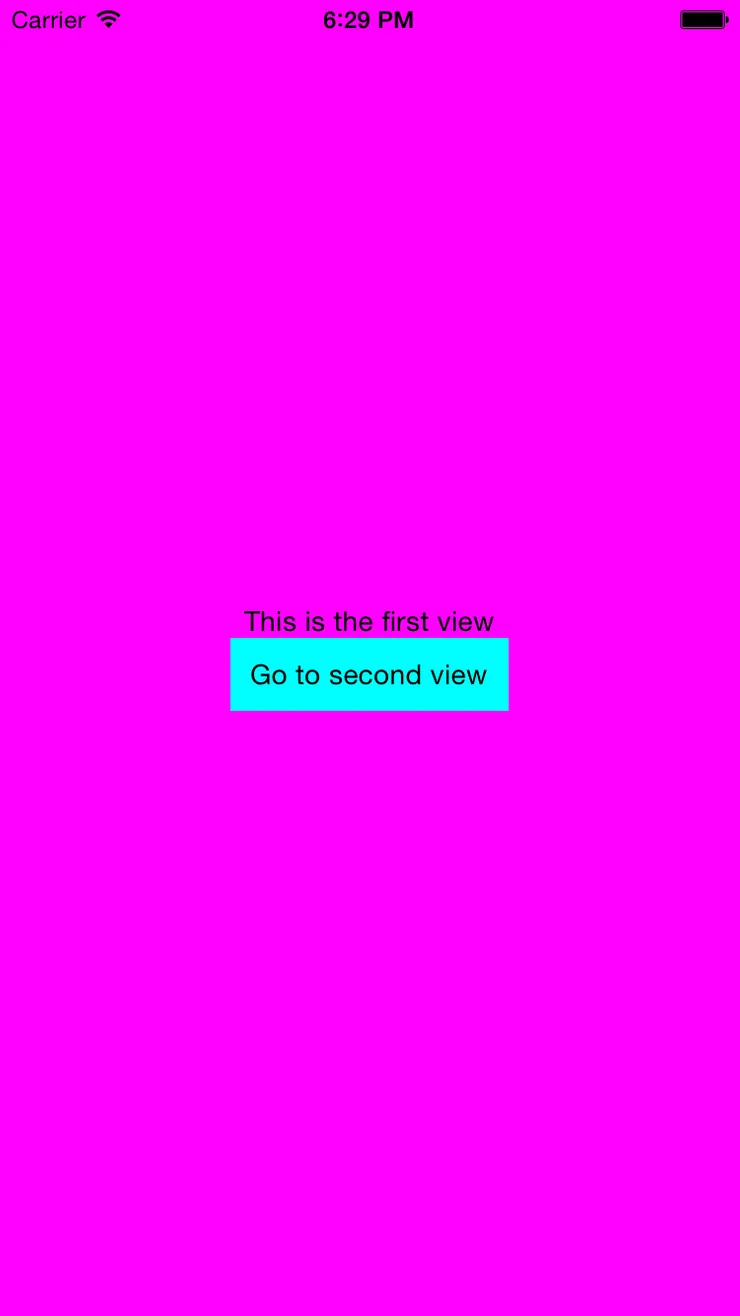
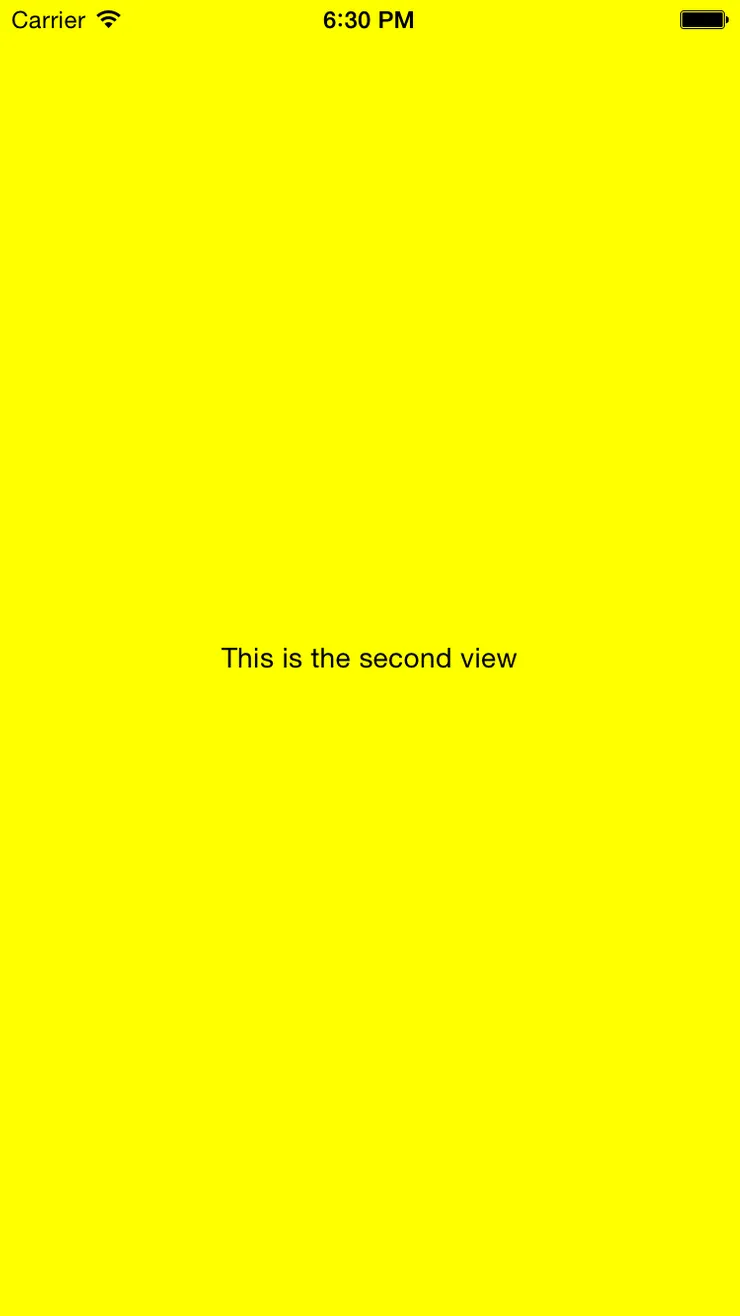
Let’s run our app… Here is how it should look.
First Screen
Second Screen
Now, there’s something missing here.
Indeed, when navigating in an app, we’re expecting a Navbar on the top to navigate!
Putting a Navbar
Navigator has a way of doing this.
You can pass a component written by your hands to it and it will display it as a Navbar.
However, react native being an open source project, the community has developed a lot of packages for us to use.
In this repository, you’ll find a non-exhaustive list of great packages.
Here, we’ll be using the package React Native Navbar.
Let’s install it.
npm i --save react-native-navbar
Then, let’s import it in our two views.
import NavBar from 'react-native-navbar';
FirstComponent
render() {
  const titleConfig = {
    title: 'First Component',
  };

  return (
    <View style={styles.container}>
      <NavBar title={titleConfig} />
      <View style={styles.content}>
        <Text>This is the first view</Text>
        <TouchableHighlight onPress={() => this.props.navigator.push(SecondPage.route())} style={styles.button}>
          <Text>Go to second view</Text>
        </TouchableHighlight>
      </View>
    </View>
  );
}
SecondComponent
render() {
  const titleConfig = {
    title: 'Second Component',
  };

  const leftButtonConfig = {
    title: 'Previous',
    handler: () => this.props.navigator.pop(),
  }

  return (
    <View style={styles.container}>
      <NavBar title={titleConfig} leftButton={leftButtonConfig} />
      <View style={styles.content}>
        <Text>This is the second view</Text>
      </View>
    </View>
  );
}
In order for our components to render as we expect them to, we need to change a bit our components’ styles.
container: {
  flex: 1
},
content: {
  flex: 1,
  backgroundColor: '#FFFF00',
  justifyContent: 'center',
  alignItems: 'center'
}
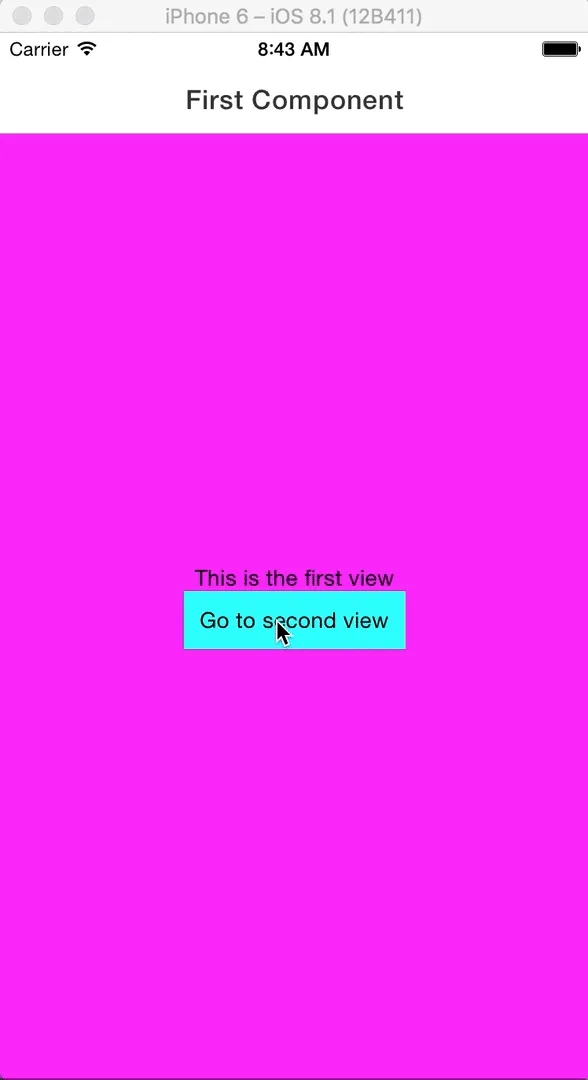
Here is what we have now!
Conclusion
We now have a fully functional React Native app.
Of course, it doesn’t do much yet but I’m sure you’ll be able to build on this.
To go further in building apps, the next good thing to take a look at is redux.

