Getting Started Headless on Raspberry Pi in 10 Minutes
Guillaume Renouvin5 min read
A Raspberry Pi is a low cost, small single-board computer.
It allows you to develop your own projects and let them run all day on this mini computer.
Possibilities are endless: home automation, Internet of Things,
robotics projects, or run your own router, seedbox, NAS, …
You can also use it as inexpensive project server.
But let’s start from the beginning!
In this article, I will show you how easy it is to install a Raspberry Pi headless
from scratch (meaning that you won’t need another monitor, keyboard,
mouse than the ones of your computer) so you will ‘only’ have to type your code
from your pc and launch your server via ssh.
If you don’t own a Raspberry Pi yet, maybe I’ll make you want to buy one!
Prerequisites
Of course this tutorial require some stuff to work with:
- A Raspberry Pi, obviously
- An ethernet cable
- A battery
- An SD card
- Your computer
This can all be bought for around 50-80€ on amazon or thePihut.
Install raspbian on your SD card
As any computer, your Raspberry Pi will need an operating system to work with.
First, download Raspbian on their official page.
Raspbian is a free OS based on Debian optimized for the Raspberry Pi architecture.
It contains the set of basic programs and utilities that make your Raspberry Pi run.
Plug your SD card and find the disk where it is mount on your computer with
diskutil list with macOS or df -h on Linux.
Unmount the disk and copy the OS on your SD card.
For Mac:
diskutil unmountDisk /dev/<disk where your SD card is mounted>
or, for Linux:
umount /dev/sdd1
Then write the image to the card with
sudo dd bs=1m if=<your .img file> of=/dev/rdisk<disk where your SD card is mount>
Raspbian is now your Raspberry Pi new OS!
Raspberry Pi doesn’t have ssh activated by default.
You can (and should) authorize ssh by adding an empty file named ssh at boot directory
cd <SD card directory> && touch ssh
First connection
Now, let’s connect to your Raspberry Pi for the first time.
First, you will need to find your Raspberry Pi ip.
Find your computer ip address on the network and the subnet mask with
ifconfig | grep 'inet '
This will display your network interfaces ips (which should look like ‘192.168…’) and netmasks (for example if your netmask is 0xffffff00 your subnet mask is 24).
Then find your Raspberry Pi ip
sudo nmap -sP <Computer IP address>/<Subnet mask> | awk '/^Nmap/{ip=$NF}/B8:27:EB/{print ip}'
This will return the ip of your Raspberry Pi by checking all ip addresses of your local network, find the one of your Pi, and print it.
You can now connect with ssh to your Pi:
The initial user is Pi and the password is raspberry:
ssh pi@<IP>
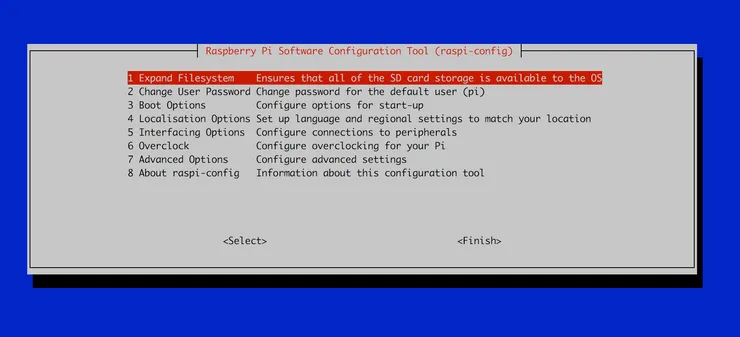
You can edit your default configuration with raspi-config:
On your first connection, you should also upgrade your packages with
sudo apt update
sudo apt dist-upgrade
and modify your root password with sudo passwd
Authorize your ssh key to connect without password
If you don’t want to fill your password each time you connect to your Pi, you can authorize your ssh key.
Follow this great github tutorial to generate a ssh key if needed.
Then log to your Pi and create a .ssh directory on your Pi if it doesn’t exist
sudo su
cd ~
install -d -m 700 ~/.ssh
touch ~/.ssh/authorized_keys
Then add your public key (on your computer at ~/.ssh/id_rsa.pub) to your Raspberry Pi at the end of ~/.ssh/authorized_keys
Your first server on a Raspberry Pi
It’s all set!
Now let’s try your newly configurated Raspberry Pi with a minimal project to see if
everything works fine.
Let’s try it with a NodeJS server.
First install NodeJS:
wget http://node-arm.herokuapp.com/node_latest_armhf.deb
sudo dpkg -i node_latest_armhf.deb
Create a file server.js with those lines
var http = require('http');

var server = http.createServer(function (request, response) {
  response.writeHead(200, {"Content-Type": "text/plain"});
  response.end("Hello World\n");
});

server.listen(3000);
Run it with node server.js and go to http://\<IP>:3000/
You should be able to access to your first server hosted on a Raspberry Pi on your
local network.

Develop from your host machine
It’s all very nice, but you will obviously not be working in ssh for a substantial project.
To work from your computer, you will need to mount your distant directory on your computer.
Luckily, this can easily be done with SSHFS.
SSHFS (or Secure shell file system) lets you share a file system securely using
SSH’s SFTP protocol.
SSHFS is based on the FUSE file system that allows a user with no privileges to access a file system without having to modify the kernel sources.
No more theory, let’s practice.
First, install SSHFS and FUSE (if you use a Mac, go to https://osxfuse.github.io/,
on Ubuntu/Debian sudo apt-get install sshfs).
Then, create a directory on your computer and mount your Raspberry Pi project
directory on it with SSHFS
mkdir pi
sshfs root@<IP>:<Path of your project on your Pi> pi
cd pi
You can now access your project directory directly from your computer and modify your files.
Don’t forget to unmount the project when you are done:
umount tmp
Conclusion
You’ve just learnt how to configure a Raspberry PI from scratch headlessly, if you’re
interesting on the project stay tuned for next article about how to use it for home automation !